/-/S'pht-Translator-Active/-/
|
|
/-/S'pht-Translator-Active/-/ |
| Tour of Duty - Let The Lava Lead You | ||
| Posted By: PerseusSpartacus | Date: 1/2/18 11:19 a.m. | |
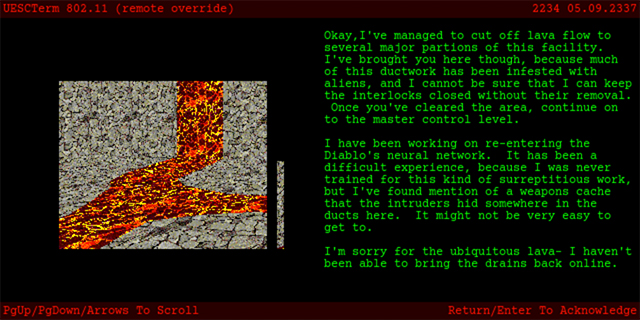
 Alright, so I meant to get this write-up done a week or two after the last one, but I've had a really busy month, and it's been hard to find time to write, so this dragged out way longer than I meant for it to... again. My sincere apologies. Last time on Tour of Duty, we wandered around a dark engineering facility full of pirates, malfunctioning platforms, and some humans – including a few who weren't actually humans! We got crushed to death by the first door, lightly toasted by a dip into lava to pick up shotgun shells, partially ventilated by Troopers, and chased around by bouncing bombs from not one, but two MOACs! Thankfully, we managed to survive that hell hole, and now, presumably, we're at what Merlin called "the main power level for the facility." Merlin also warned us that this area "has been badly flooded with lava," thus the name of the level. To start with, we begin in a small, dark room with a Terminal, a Pattern Buffer, and some Shotgun Shells. Let's read:
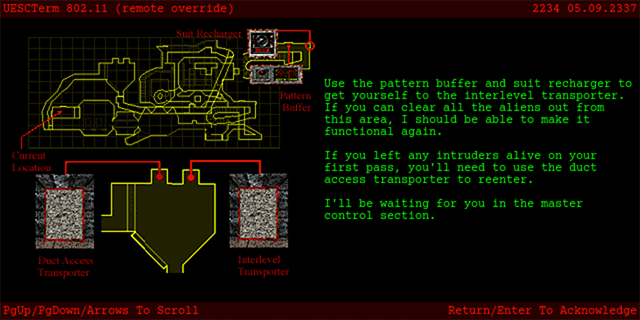
Some useful information to remember here: 1) At the end of the level, there will be two teleporters, as shown on the map that Merlin provided. The teleporter on the left will take us to some local ducts, while the one on the right will take us to the next level.
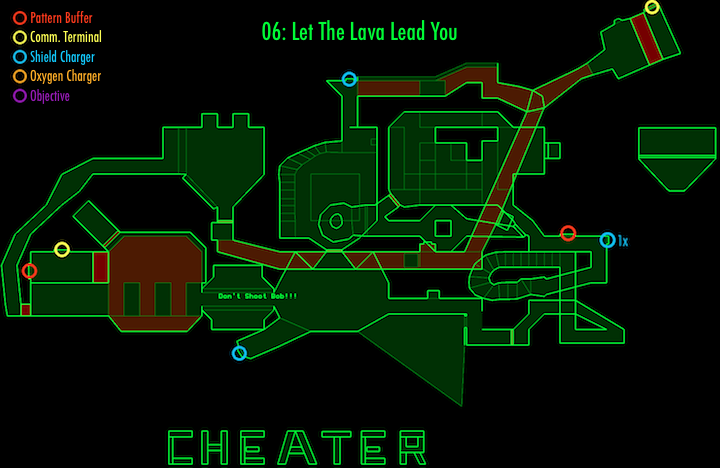
Now we have an idea what our objective is, time to stuff a fresh clip in our AR and get moving. The eastern wall of this small starting room turns out to be a door, which opens up to reveal we're on a ledge above a room full of shallow lava. There are three glowing platforms raised just above the lava level, and a door on the far side – this is the only safe place to go. If you move forward from the ledge, a whole pile of Once the area is clear, you can drop down to the platforms below, being careful to stay out of the lava. It was possible to see this from higher up, but it's more obvious from here: the door on the far side of this lava chamber leads to a corridor, which is flanked on either side by two windows, both of which open into areas packed full of Assimilated BOBs. These won't blow up on their own, because they can't get close enough to you, but they are close enough and the corridor is narrow enough that you certainly wouldn't want to shoot them while standing in the hallway – better to stand back on the platforms, set them off from a safe distance, and enjoy the fireworks. Fun fact: it's worth noting that you might hear a death scream from a BOB when the pirates first teleport in – this is because one lonely Assimilated BOB teleports in with them, but he teleports directly into lava with no way out, so he inevitably gets burnt to a crisp within seconds. To the casual eye, it would seem that there is nothing more in the lava chamber to do, but in fact, there's a surprising and devilishly well-concealed secret hiding in plain sight here. Along the eastern and northern walls of this room is a narrow ledge just above the lava – it's hard to see, because its surface is textured to look just like the lava next to it. If you follow this ledge to the northwestern corner of the chamber, you'll find a secret door revealing a room with two Assault Rifles and some ammo for them and your Pistol(s). Very handy for Vidmasters! This is the first secret, but not the last, in this level – funnily enough, I didn't know that any of them even existed until I started this write-up and noticed odd rooms while looking at the map in Weland. If you look back at where the starting ledge is, you'll notice that just to the left of the door (which blends in with the wall) is a gaping, dark hole. This is the exit from the ducts that Merlin mentioned earlier. If you know it's there, you can actually jump to this ledge directly from the starting point; just run at top speed along the right-hand wall and turn sharply right as soon as you step off the starting ledge. More about that later. Before we continue, let's have a look at the map:
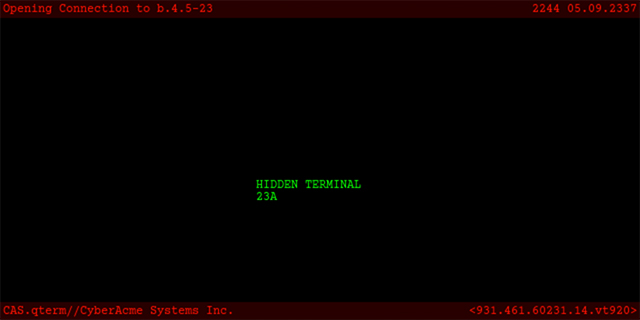
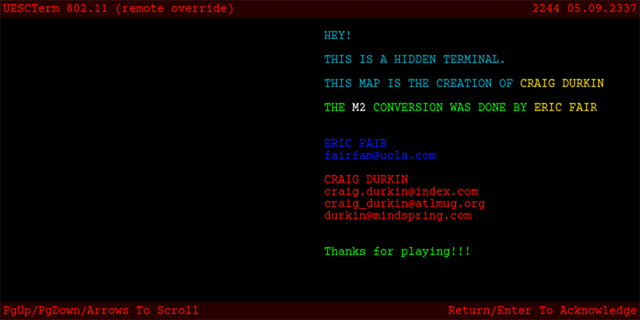
We're currently in the lava chamber just west of the hallway marked "Don't Shoot Bob!!!". The 'CHEATER' text is a little odd, and really seems targeted at those using map editors (I don't believe the map designers could possibly have expected that I'd be seeing that text via the use of a lua script that reveals the entire map - this scenario was made back in 1996, after all). Considering there are not one, not two, but three secret areas on this map, I can understand the map designer's concern about someone cheating to discover their locations. Heading east through the corridor that had previously been flanked by A-Bobs (and now is flanked by their corpses), we come to a dark room with several Cyborgs, a Hunter, and some Drones. This is a surprisingly dangerous encounter, especially as these enemies usually take a while to notice you and become active, creating a potential ambush. You can take advantage of this, however, by running directly through the room to the hallway on the far side - the enemies will be slow to react, allowing to get through unscathed. Once you're in the hallway, the enemies will not follow you, allowing you to step out of cover, fire some fusion bolts, and then duck behind cover. This is much safer than trying to run circles around the Cyborgs and avoid their tracking bouncy-grenades. In the southwest corner of this room is a ledge that's open to the night sky and has a visible Shield Charger. It's quite high, but it is definitely possible to grenade jump up to this ledge; this is absolutely worth doing if you already have health to spare, because this particular Charger turns out to be a 3x – not something you want to miss! At the north-center of this room is a door that leads to a later part of the level, but I've never figured out how to open this, so it's not really helpful. Heading east leads us through some corridors, past a window, through a 5D space turnaround, and to a flight of stairs with a bunch of Fighters on it. Interestingly, these Fighters have been intentionally restricted by the map designer to stay put – the step in front of and behind each one of them has been made a 'Monster & Item Impassable' polygon, so they have nowhere to go and just stand in place on their steps and take pot-shots at you. Eventually, after mowing this lot down, we come to a 1x Charger (now rendered basically irrelevant by the 3x Charger we encountered earlier) and a Pattern Buffer (much more useful). Following the corridor northwest leads us to a well-lighted room with a dead-end, boxy ledges above us, and a number of Compilers that teleport in. We're forced to instead go through a door on the west side of the hallway, which leads us to a hexagonal section with a pillar in the middle. The right-hand side is blocked with a couple of large cylinders and so we head around the left side of the pillar, coming around to find some ammo behind the cylinders. As soon as you go west of the hexagonal section, a Major Trooper teleports in behind you – a nasty ambush! A quick trigger finger, and maybe a Shotgun at the ready, should allow you to emerge unscathed. Moving further along takes us past a window that exposes some strange and inaccessible area vaguely reminiscent of the exposed machinery way back on Shake Before Using, and then we loop around to the opposite side of that room with the boxy ledges and Compilers. It's very bright in here, as almost every surface is a light panel. Climbing some stairs and grenading a few Troopers above us, we jump a few gaps and come to the easternmost ledge of the room. There's two places here that you can drop down into and become stuck in; the one in the center of the room will teleport you back to the lava chamber at the beginning of the level (ouch), and the other in the northeast puts you back on the eastern ledge (right where you need be). A recessed area on the easternmost ledge turns out to be a teleporter, which drops us off in a chamber in the center of the map with a large staircase. As soon as we arrive, a whole swarm of enemies teleport in, including Cyborgs, Fighters, Compilers and Hunters – a real nasty group, especially since we have little room to maneuver and are surrounded on all sides. There's really no option here other than to run around really fast, guns blazing, dodging the shots until the baddies are all dead. This is easily the most difficult part of the level, but it's made a lot easier by the fact that we charged up to 3x Shields earlier. Heading up the stairs takes us north, to a ledge with not one, but two oddities: a low square pillar with a lava texture on top, and a wall that's infinitely thin (it's literally a line between two polygons that was made solid instead of transparent). These are both clearly intentional, but don't make much sense – maybe the lava texture is supposed to represent a display panel that's showing us the view from some imagined 'camera' on the level, but the super-thin wall makes no sense no matter how you look at it. Interestingly enough, we already encountered one of these, back at the start of the level – the wall separating the starting room from the engineering ducts is also just a line. Very strange design choices, all things considered. Going north takes us to another 3x Charger (yay) and an area of the level I will call "the Lava Channels" – a part highly reminiscent of the lava tubes situated above A Converted Church in Venice, Italy. Like those tubes, these Lava Channels are a gauntlet of lava at various depths and heights that you must run through at top speed to reach a couple of safe spots along the path. Unlike the tubes on Converted Church, however, this path is open from the start – no need to hit 20 switches just to clear the way – and there are a couple of enemies (mostly Compilers) sitting on the first safe spot, so you'll need to kill them before making your run. From here it should be a straight shot to the end of the level, but first we need to uncover some secrets – two of them, to be specific, both very similar. The first is fairly straight-forward: at the very northeast corner of the lava channels is a platform under the lava. Stepping on this will cause it to descend. If you dive under, swim northeast, and go back up, you'll come to a secret room. On the left-hand side is an Invincibility power-up (which you will want to avoid picking up at first, so just make sure you walk to the right as soon as you enter the room) and a switch. The switch might not appear to do anything at first, but after a few seconds it will open a large door, revealing two Shotguns and a massive pile of Shotgun Shells. But wait, that's not all! If you hit action on the left-hand wall of this large ammo closet, you'll reveal a hidden terminal:
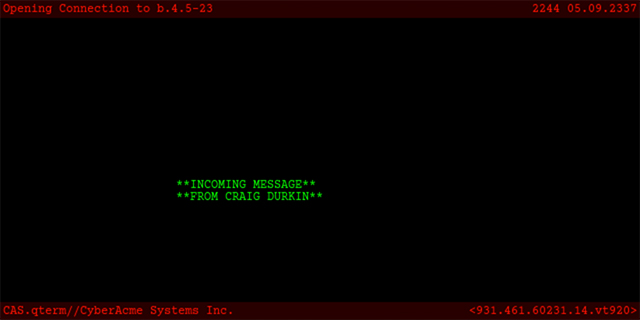
Very neat. Now you can pick up the Invincibility powerup to let you make the swim back down to the platform to continue your journey through the Lava Channels. But wait again, that's still not all! That was the easier secret of this area, but there's a much tougher one. See, there's a rest stop (i.e. a square polygon raised out of the lava) a little over halfway through the Lava Channels, and next to this rest stop is a switch. In normal play you would probably hit this switch and never figure out what it does. A bit of investigating on my part, however, revealed that it actually opens a secret door behind the main teleporter in the well-lighted chamber in the northeast of the map (and right about now is when I really start wishing I had annotated our maps with letters so I could just point to them instead of doing all these rambling descriptions of things, but I digress). The problem is that this secret door stays open for only eight seconds, so it's not like you can just backtrack through the level and go through it. The thing that makes this tricky is that in order to get to this secret door in time, you have to run back a short ways through the part of the Lava Channels you already went through, and hit action to open another secret door on the east side of the sunken part of the Channel. You then have to quickly swim up into this raised area – this will teleport you back to the easternmost ledge of the well-lighted chamber. If you did this fast enough, you should see the door that you opened with the switch still open – run through this, and you'll be teleported to a secret room floating in the empty space on the east side of the map. In here is another terminal, this time immediately visible:
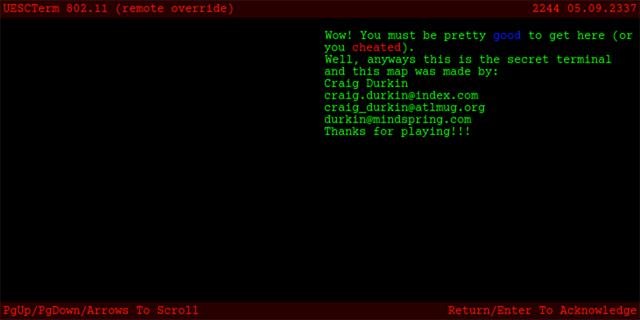
Personally, I can say I cheated to find this secret. You, on the other hand, can simply say you heard it from me, and that you were neither good nor a cheater, but rather that you were merely spoiled. ;) You can tab open another secret door in here to reveal a couple Fusion Batteries; standing behind this door will teleport you back to the starting room. So, with all of the level's secrets out of the way, we can now proceed through the rest of the Lava Channels to arrive at the final room. There's really not much to say here. You go through a door, and inside is a medium-sized room with two teleporters and a bunch of enemies, specifically 4 Fighters and 3 Enforcers in the middle of the room, and 2 Hunters on a ledge directly to your left as you enter; interestingly enough, the 3 Enforcers here are the very first Enforcers we've met in this scenario. If you'll recall, Merlin did say that the teleporter on the left will take us through the ducts so we could go back through the level to deal with any enemies we missed along the way, while the one on the right will send us to the next level. Since I haven't talked much about what's actually in the ducts, I'll take us through the teleporter on the left. This drops us off just a few meters away, on the other side of a window on the west side of the transporter room. There's a F'lickta and some Drones here (almost all of which could be taken out from the safety of the transporter room), as well as one random Pistol clip. A little further on is a Fusion Pistol in the middle of a small pile of Fusion Batteries, and then eventually a door leads to a ledge overlooking the initial lava chamber. There's an Assault Rifle and some ammo for it here, as well. As I said before, you can jump to this ledge from the starting room, and presumably vice versa, so a knowing Vidmaster will probably want to do that, grab the AR and Fusion Pistol, and then come back to deal with the initial enemies. Going back through the level won't reveal anything new or interesting (though it will allow to find the secrets if you missed them the first time around), so eventually we must take go back to the transporter room and take the right teleporter. And with that, this chapter of the Tour of Duty comes to an end – as does my (obviously cursed) three-level run in Devil in a Blue Dress. Seriously, I am really sorry these last three write-ups have taken me so unnecessarily long to finish. Next time on Tour of Duty, Martin will take down masses of Hunters and Troopers, get help from some infinitely-respawning humans, and examine a bizarre money-making scheme – no joke. Until then,
Vale,
| ||
|
| Replies: |
| Tour of Duty - Let The Lava Lead You | PerseusSpartacus | 1/2/18 11:19 a.m. | |
| Re: Tour of Duty - Let The Lava Lead You | General-RADIX | 1/2/18 12:42 p.m. | |
| Re: Tour of Duty - Let The Lava Lead You | PerseusSpartacus | 1/2/18 1:31 p.m. | |
| Re: Tour of Duty - Let The Lava Lead You | Martin | 1/2/18 1:47 p.m. | |
| Re: Tour of Duty - Let The Lava Lead You | PerseusSpartacus | 1/2/18 4:11 p.m. | |
| Re: Tour of Duty - Let The Lava Lead You | Yossarian | 1/2/18 6:11 p.m. | |
| Re: Tour of Duty - Let The Lava Lead You | PerseusSpartacus | 1/3/18 6:00 a.m. | |
| Re: Tour of Duty - Let The Lava Lead You | Yossarian | 1/3/18 9:33 a.m. | |
| Re: Tour of Duty - Let The Lava Lead You | VikingBoyBilly | 1/3/18 12:13 a.m. | |
| Re: Tour of Duty - Let The Lava Lead You | PerseusSpartacus | 1/3/18 6:03 a.m. | |
| Re: Tour of Duty - Let The Lava Lead You | Martin | 1/3/18 9:46 a.m. | |
| Re: Tour of Duty - Let The Lava Lead You | VikingBoyBilly | 1/3/18 3:33 p.m. | |
| Re: Tour of Duty - Let The Lava Lead You | VikingBoyBilly | 1/3/18 3:34 p.m. |
|
Problems? Suggestions? Comments? Email maintainer@bungie.org Marathon's Story Forum is maintained with WebBBS 5.12. |