/-/S'pht-Translator-Active/-/
|
|
/-/S'pht-Translator-Active/-/ |
| Tour of Duty - Galactica II | ||
| Posted By: PerseusSpartacus | Date: 6/23/18 7:52 a.m. | |
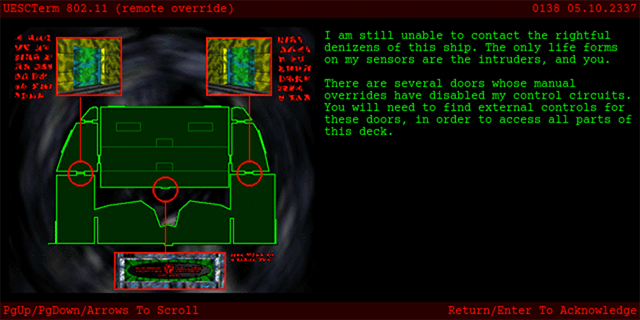
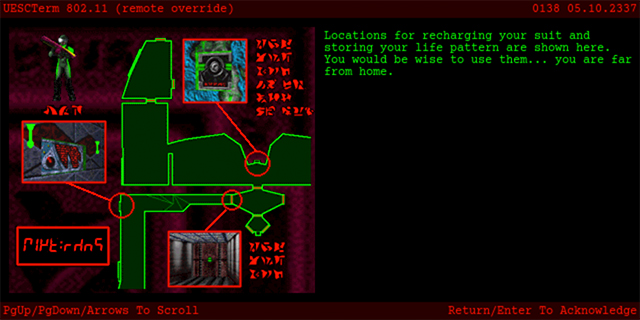
 Hello again, everyone! Sorry for the delay, I got a bit distracted for a while there. Last time on Tour of Duty, Martin tried to guide us through a terribly, terribly complicated level that was intentionally designed to be nigh-impossible to navigate properly. Relying on our new friend, Fr'kna - who seems to have developed the unique ability to print out text in two columns instead of just one - we managed to successfully hunt down a series of switches. The apparent purpose of this insane drudgery was to reconfigure several sensor arrays so that Fr'kna could identify a safe place to teleport us in close to his ship's damaged reactor. That mission accomplished, our goal now is (presumably) to stop the reactor from exploding. We arrive in a fairly large, open room, raised at the south end, with a scattering of Assault Rifle ammo and grenades available (very handy). The textures are still in the old The Fighters being dispatched, let's read:
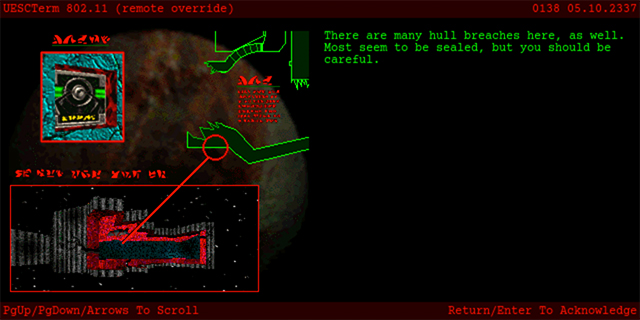
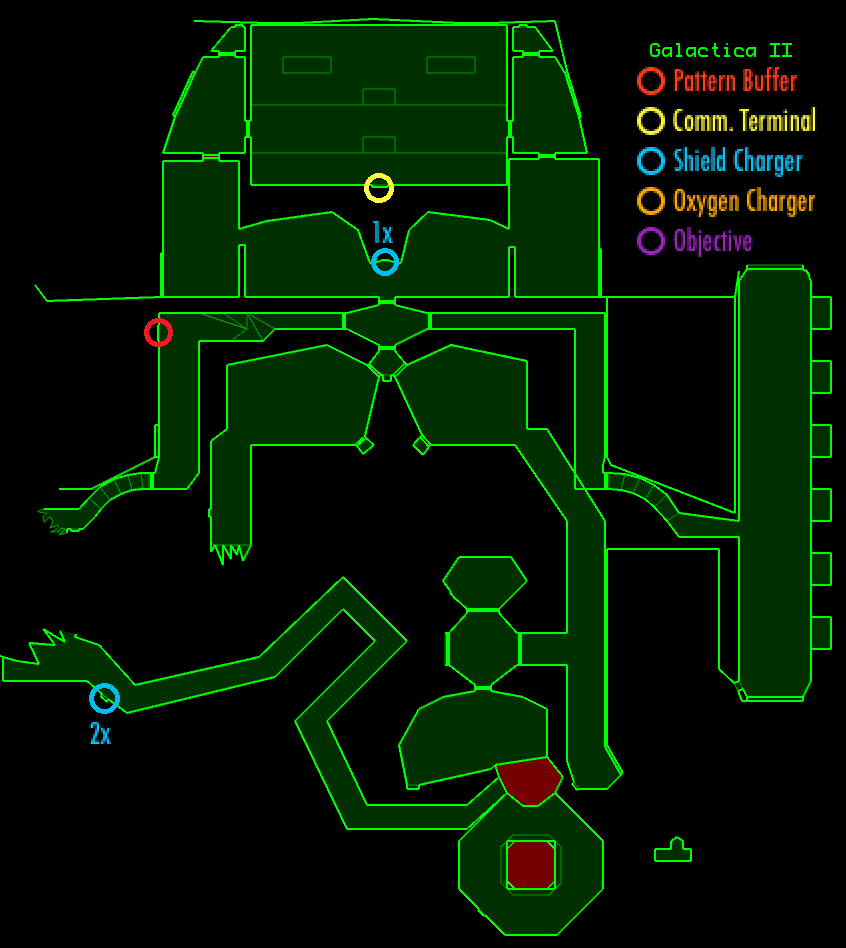
Sure enough, we are here to prevent the reactor from exploding. You might fear that the hull breaches would mean yet more vacuum, but fortunately for us, there is no vacuum whatsoever on this level - which is a little bit odd, because you can actually get to the hull breaches and stand next to them, as you will see. Last level it seemed like there wasn't even a window to look out of, and yet that was the vacuum level, not this? I get that the vacuum on the last level was a conscious choice (and a sadistic one at that), but the logic here is a bit strange. Oh well, back to gameplay. To the east and west are doors, which take us into side rooms. The west one contains a blue Fighter, and the east one contains a major Enforcer. At the north end of each is a door, which reveals a closet with two blue Fighters and a switch - each switch opens another door at the south end of its corresponding room. Heading south from either side room takes us into a set of three pitch-black chambers. In the center of them is a protrusion in the wall that contains a 1x Shield Charger (as indicated by Fr'kna earlier), but between us and it are a whole host of blue Fighters - turns out, these are the main enemy type on this level. In fact, a number of them here teleport in, and they're actually meant to teleport in behind us! So, be careful not to get surrounded here - keep moving and keep firing, and don't let yourself get pinned, or you're in for a world of hurt. Now with the Charger secure (along with some fusion batteries near it), we can head south through a door-- YIPES!! As it turns out, there's actually two blue Fighters standing directly behind this door, so if you're standing too close to it when you open it, you're in for a serious shock... possibly literally. The room they are guarding contains a Fusion Pistol and three doors. The west and east ones are locked, but the southern one opens up to reveal another small room, with an electrical panel. Naturally, we punch the panel, and-- oh not again! Punching the panel opens a door on either side of it - both have blue Fighters standing just behind them, waiting for you as soon they open. What's worse, these fellows have company - four major Hunters right behind them, as well as some other blue Fighters likely to teleport in as soon as they hear gunfire. I guess that Fusion Pistol we found a moment ago was a hint; be ready to use it! The path now splits again - you can go through the west door or the east door. I would recommend going west here, simply because this leads to the switch that will give you access to the Pattern Buffer. If we didn't trigger them already (though we very likely did), there are some blue Fighters that teleport in here when you advance far enough, and just beyond them, a hull breach and a switch. This opens a door in the room with the Fusion Pistol - head back there, go west, and you'll see the Pattern Buffer. When you go for it, though, you'll likely trigger an invisible Compiler, who is very, very difficult to see in these dark hallways (this level is very dark all throughout, by the way, which can be a real problem at moments). Now that we know how to get to the Pattern Buffer and the Shield Charger, we can take a little breather and have a look at the map:
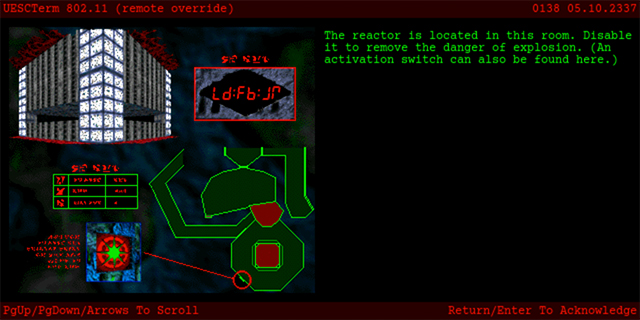
As you can see, this is a relatively straight-forward level (particularly compared to the last one, though that isn't really saying much). Heading south from the pattern buffer, we go out a door and down a staircase to find another switch next to a hull breach, guarded by an invisible Compiler. If we go back, we'll find that that switch opened a door opposite the one to the Pattern Buffer - this new door takes us east, through some more Fighters, down south to another staircase. We go down the staircase, and notice what appear to be Mothers of all Hunters up in dark, raised recesses looking over a long, tall chamber. Instinctively you might want to pull out your Rocket Launcher and take a shot at one of them while they're still inactive, but if you do, you'll discover that they are actually just decorative - they're stuck behind an invisible wall (glass, I guess) and unable to do anything. I'm not sure what they're even supposed to be doing there. After all, as Martin pointed out to me, this is the Ygn'oml ship, so why are there Hunter suits (which belong to the pirates) being stored on board? There are, however, some more Fighters in here, but you're given plenty of room to run around in, so they're not much of a threat. What's more of a threat are four Drones down at the south end, which come in via a high hole in the wall next to a window into space - if it were just the four that start there, they wouldn't be a threat either, but the problem is that if you kill more than two of them, they'll continue to respawn so that there will always be two of them still alive to harass you in this room; fortunately, they won't follow you up the stairs. Best not to waste too much fusion ammo on them, therefore. At the north end of this repair hall, if I can call it that, is another switch; this opens a door that you'll need to go through a little while later. We go back to stop by the Shield Charger and Pattern Buffer before continuing on. The next place to go is through a door in the southeast - this leads down another pitch-black hallway, with some more Fighters and a Hunter. At the south end of this is another switch, but this one, oddly enough, does nothing useful - it merely closes two glowing recesses in some earlier rooms. A door on the west side of the hallway, which we opened from the repair hall a moment ago, leads to a small, light room with some more enemies and three doors. The west door opens a window into space - not particularly useful. The north door is locked, and the south door leads us to the reactor room and a final big set-piece battle with yet more Fighters and Hunters. Be careful here, because as you enter the reactor room, you'll trigger the locked door just to your north to open up, revealing a monster closet which dumps some more Fighters right behind you. I like to use the Assault Rifle here, as the enemies tend to bunch up a bit and the Grenades cut through their numbers nicely. Once the Fighters are gone, if there are some Hunters left, the Fusion Pistol makes short work of them. With that, we are now in the reactor room. Head south and you'll find a switch and a platform moving up and down that appears to have an invincibility powerup on it. Hitting the switch turns the platform off - this is, presumably, the mission objective that Fr'kna gave us. We go back to the Terminal at the start of the level, and... Wait, there's no new message. Why isn't Fr'kna teleporting us out yet? We did turn off the reactor, right? Yes, but the exit to this level is rather unusual. See, when entering the reactor room for the first time, you may notice a light panel in the north-west side of the room. Walk into it, and you'll find it's actually a teleporter. This takes you into a tiny closet floating by itself in the southeast area of the map, with contains several polygons, that just keep teleporting you along horizontally through the closet over and over, looping you through the room. If you check the map, you'll notice there's a recess in the top of this little floating closet, and if you step backwards at the right time, you'll go into it. This recess teleports us back to the reactor room, this time onto the edge of the reactor itself. If we timed the switch right earlier, we can get to the invincibility powerup inside. Once we get down from the reactor, we find that a large hole has opened up in the middle of the room - this was actually opened as you stepped into the closet's northern recess. We drop down into it, and find a hallway heading west with some Fighters and an invisible Compiler that lead to another hull breach and a 2x Shield Charger. It's not immediately apparent at first how to exit from here, as there's no way to go back from here to the rest of the level, and stepping out from the hull breach doesn't do anything (it's amazing how you can just stand in empty space like that). A bit of wandering around, and eventually we find that the left-most part of the hull breach, with an alien skeleton on it, is actually the exit teleporter! So that's it - a short, simple level, very much the opposite of the last one. I think this is a decent level, though it could use some polishing, and it makes for a nice break from the challenge of Sensori OverLord. Next time, VikingBoyBilly will guide us through a superficially chaotic, but deceptively simple spiral of run-and-gun fun. Vale,
| ||
|
| Replies: |
| Tour of Duty - Galactica II | PerseusSpartacus | 6/23/18 7:52 a.m. | |
| Re: Tour of Duty - Galactica II | General-RADIX | 6/23/18 6:07 p.m. | |
| Re: Tour of Duty - Galactica II | PerseusSpartacus | 6/24/18 9:48 a.m. |
|
Problems? Suggestions? Comments? Email maintainer@bungie.org Marathon's Story Forum is maintained with WebBBS 5.12. |