/-/S'pht-Translator-Active/-/
|
|
/-/S'pht-Translator-Active/-/ |
| Tour of Duty - All Roads Lead To Sol... | ||
| Posted By: PerseusSpartacus | Date: 12/30/13 3:55 p.m. | |
|
28 - All Roads Lead To Sol... Last time on Tour of Duty, Martin led us through a strange and rather difficult level filled with Hunters, Cyborgs, and S'pht'Kr, Durandal informed us that Thoth has switched sides, and is now trying to assist the Pfhor, even though they "continue to ignore him", and requested we eliminate one of the Pfhor's "finest armor units", the 723rd Aggressor Squadron. So this is the last level of Marathon 2. After everything we've been through - the gauntlet of If I Had A Rocket Launcher, the hectic combat of Sorry Don't Make It So, the ambushes of Begging For Mercy, the paranoia of God Will Sort The Dead, the puzzles of Kill Your Television, and the confusion and irritation of Feel the Noise - surely this must be worse than all of those. After all, we're up against a Pfhor armor unit, and we remember how much trouble they caused us way back in the original Marathon on Try Again. If you want the ultimate challenge in Marathon, go back to Ingue Ferroque, or even Begging For Mercy, because this really isn't a massively challenging level. Indeed, the way it operates is really mostly built on the premise of moving forward, clearing the next area, falling back, recharging and stocking up on ammo, and then moving forward again, several times over. The final room certainly isn't easy (indeed, I died at least once in my Normal playthrough), but everything up until that point is pretty straight-forward. Foreknowledge of the level certainly helps, but this isn't the kind of level where you will die a thousand deaths until you know the layout of the map like the back of your hand. We start atop a ledge with two lava pits on either side, one so deep that it nearly reaches the ledge, and the other very shallow. There's two Rocket Launchers here, along with a lot of infinitely-reappearing ammo for them. Heading through a little door past these Launchers is a small room with a Pattern Buffer, a 2x Shield Charger, two ARs, and eight grenade packs. There's also some unusual niches in the walls that have lava in them. Strangely, no terminal here. Indeed, you won't have a terminal available to you until the very end of the level. This is very unusual for any Marathon level, but if you finished the last level, you should already understand your goal - you're here to humiliate the 723rd. Heading out the door again, at the far end of the ledge is a staircase heading down to about the height of the shallow lava pool, with a door at the end. Before we go that way, let's look at the map:
Right now we're at the northernmost part of the level. While we're thinking of maps, it's worth noting that this is one of the few Marathon 2 levels that has Map Writing on it, to the effect of: 723rd KICKS WUSSY NAR BUTT! Evidently the 723rd was involved in the subjugation and/or destruction of the Nar, a species we were introduced to way back on Curiouser and Curiouser: Our little trick with the Pfhor's defense
Interesting to note how recent that event is supposed to have been - two decades ago, just three years before the events of the original Marathon, and apparently the same year we had to face down Chockisens that were harrassing the work teams on Tau Ceti. Heading southwest, at point A we encounter a lovely stash of two Fusion Pistols and a bunch of infinitely-reappearing Fusion Batteries. This is quite a nice feature, as the Fusion Pistols is a great all-around weapon, and it actually does a pretty good job at handling the Juggernauts on this level, provided you use the overcharge feature liberally. At any given time, you should have at least 16 batteries in hand, as that is the number of batteries provided at a given time by this infinite supply. If you keep returning to this spot, though, you should be able to get a full supply of 25 batteries. Combined with the infinite supply of rockets at the very start, the 2x Shield Charger from earlier, and a 3x Shield Charger in the very next room, it's pretty close to impossible to lose this level unless you make some really insane mistake, at least until you get to the final room. This is very different from Ingue Ferroque, which could easily kill you even if you played flawlessly. In the next room, you'll encounter some Hunters and a couple of Fighters teleporting in on a ledge around a pool of lava. This is nothing terrible, and the Fusion Pistol makes short work of all of them. Just be careful to not get caught out by one particular Hunter who teleports in sort of behind you on the same ledge. Heading further along the ledge, you'll see something rather large and blue (or brown, if you're playing on Total Carnage) teleport in out above the pool of lava. This is the Juggernaut:
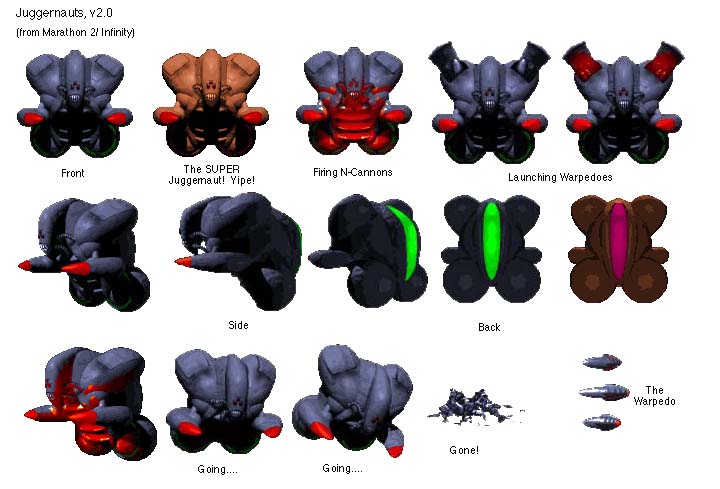
This new kind of Juggernaut is a bit different from the last one we saw. Instead of bullets, they now have two Alien Weapons, and their missiles now lock onto you and follow you, making dodging a bit more difficult. Also, we now have proper names for these weapons, based on the terminal picture from the end of the last level:
Apparently, the missiles are called Warpedoes (or is it Warpeados, because that's the spelling the picture provides), while the Alien Weapons are called N-Cannons, a name I mentioned way back when we first encountered that gun back on Come and Take Your Medicine, but until just now, I did not know the true source of the name. Also in that picture, one can barely make out this text: In the rather unwieldy
We've already been introduced to the Nar, but what about this other species, the Nebulonese? Or is it Nebulons? More on them later in the level, but for now, we need to kill this Juggernaut. There are several ways to go about this. If you have an Alien Weapon left over from earlier in the game, you may want to put it to use now, as it works fairly well against the Juggernauts. The Shotguns can dish out a lot of damage pretty quickly, but unfortunately, there's not much ammo for them on this level. The Fusion Pistol's overcharge feature does a surprisingly good job as well, as each shot deals the same amount of damage as a rocket (fusion damage is doubled for mechanical enemies). Lastly, the Rocket Launcher works pretty well too, and you have plenty of ammo for both of the latter, so why not use them? In any case, you want to keep moving around on the ledge, or at least stand close to the door so you can duck back once the Juggernaut fires off a volley of missiles or fire rings. Eventually the Juggernaut will begin to fall slowly into the lava, emitting a loud alarm to suggest that it's about to blow. Eventually, the Juggernaut will hit the floor beneath the lava, exploding and causing the screen to flash a bright white. With the transparent liquids provided by OpenGL, you can actually make out the shape of the falling Jugger underneath the lava. Having just destroyed our first Juggernaut, we move along the ledge, leaving the next door alone for the moment, and find, to our delight, a 3x Shield Charger. With this, and an infinitely-supplied Rocket-Fusion combo, it should be a piece of cake to fight through to the end. It certainly feels that way on Normal, though I bet it's still a little tricky on Total Carnage - I wouldn't know, because I've only played through on Normal or below. Now at full shields, and probably after having gone back and grabbed a bit more Fusion ammo, and perhaps even having saved again, we move on to the next room, where we find a stash of Magnum Pistols and ammo for them. Not the most useful thing in the world, considering we now have some of the deadliest equipment in the sector in our hands. Passing through, we find another open lava pit area. This time, though, there's a gap in the walkway that is filled with lava. We could swim across, but there's a switch up on the wall (point B on the map above), so we might as well shoot it and see if it alleviates our troubles. Firing a grenade at it, we realize we not only caused a platform to raise up from below and fill the gap in the walkway, but also caused a Juggernaut to teleport in above the lava. Nothing we can't deal with, though, now that we know how to kill Juggers! Curving around the promenade (which should be red hot, perhaps to the point of melting, considering all the lava around here - makes you wonder how those Fighters earlier didn't just get incinerated the moment they teleported in, but then again I've already complained too much about that kind of thing, so I'll just leave that whole thing alone), we find a small room, empty except for three Hunters, one of whom is in fact a MoaH! Liberal application of rockets, with perhaps a small helping of fusion for the lesser Hunters, should sort this lot out nicely. Passing on, perhaps after having returned to the earlier parts to stock up on ammo and shields, we encounter yet another lava pit, with yet another Jugger, who once again receives a large dose of overcharged fusion bolts to the face, and who once again falls through the lava into oblivion, capping it all off with a nice white flash. Just past this third tin can, we encounter a Pattern Buffer (just south of point D on the map), which to some may be quite valuable. Of course, I rarely save my game on here, simply because I have complete confidence that the only part I should be worried about is the final room - everything else is easy. The room just after the Pattern Buffer is filled with Fighters and a couple of Hunters, but really this shouldn't be a problem at all. The Fusion Pistol sorts them all out very quickly. Past here, you'll find yet more enemies teleporting in further along the walkway (though strangely I don't remember them much at all), along with a Juggernaut out above the lava. Luckily, there's a rather low ceiling above the walkway this time, which has the fortunate side-effect of blocking a good portion of the Warpedoes that get launched your way, making it easier to deal with this fourth Jugger. Now, unfortunately, the door ahead is locked. To solve this problem, you'll have to do a bit of swimming... in lava! There's two places you can do it, but it's a shorter swim to do it at point C. Note that we will also be returning to this spot later on when we cover the Secret�. For now, though, we're just trying to get to the end of the level. Taking a brief dip in the lava, we swim across to a ledge with a door. This door leads to a corridor, and in this corridor is both a carrot and a stick - dual Shotguns, guarded by Pfhor Fighters. In truth, though, these Fighters, while somewhat numerous, are very easy to deal with - they're inherently bottlenecked by their environment, so even Fists will work nicely here, and if you have a Flamethrower handy from either the last level or Kill Your Television, you can just run through the Pfhor with the trigger held down, toasting them as you go. At the end of the corridor is a 2x Shield Charger (Bungie apparently doesn't want any more suicide traps at this stage), a switch that opens the door we spotted earlier, and a little bit of Shotgun ammo on another ledge looking out into the lava. Taking the dip again back at point C, we can return to the earlier parts of the level to recharge and fill up on ammo before we press on. Heading through the now open door, we go up a staircase to find ourselves in a room with four breakable panels (point D on the map) and a locked exit that opens out above the room with the infinite fusion batteries (point A on the map). Instinct tells us we should break all the panels, but in fact this is a sore mistake. Right now you only want to break three of the switches, and you want to break them in order. First let's label them all. One is directly in front of you when you first enter the room. This is panel #1. Another is directly to the right of the locked exit door. This is panel #2. Another is to the left of the locked exit door. This is panel #3. The last panel is on the wall to your right when you first enter the room. This is panel #4. You want to ignore panel 3, as it will deactivate the chargers and Pattern Buffers you've passed thus far. First you break panels 1 and 2. This opens the exit door. Then, standing inside the exit door, shoot panel 4 and jump down. As you do so, lava will fill the area. You want to quickly run through the door on the right and up the staircase to reach the very start of the level (cue Martin line). After saving the game and filling up on rocket ammo, we realize that the lava that was once filling one of the pools has somehow been moved over to the other side, and so now the lava height has reversed. This allows us to proceed through the level. The room at the bottom of the staircase has a number of Hunters in it, including, I think, another MoaH. This is why we have an infinite supply of rockets! Moving further along, we encounter a massive area full of lava, with no other way forward in sight, and with not one, but two Juggernauts floating around in the distance, shooting Warpedoes and rings of fire at us. Luckily, there's a 3x Shield Charger here to replace the one that went under the lava earlier. After a good bit of long-distance shooting at the Juggers, they should eventually both go under the lava, where they will explode brilliantly. From there, we just need to save our game, charge up to full shields, and then swim quickly through the lava to reach another ledge around the corner. This may sound easy, but it's not. On Normal you should have a little bit of purple left in your shield bar, but on Total Carnage you'll probably invariably end up with less than 2x Shields. For this reason, Bungie kindly provided us a 2x Shield Charger to fill up with after completing the long swim. Heading through the door, and up a staircase, we come to a small room with a glowy panel in the floor. Stepping onto this, we are taken to... quick, we're drowning in lava! Swim up, swim up! So much for 2x Shields, and at the worst possible time, too - there's a lot of Pfhor in this final room (point G on the map), including a Juggernaut, some Hunters, a bunch of Fighters, and a MoaH, all of whom are out to get you. This is probably very difficult on Total Carnage, but on Normal, you just need to follow a simple pattern. Keep moving, alternating between the different corners and firing rockets into the Juggernaut in the middle. As long as you keep moving from corner to corner, the Juggernaut should stay far enough away that when it finally does blow, you'll be far enough away to avoid catching any of the blast. Meanwhile, the other Pfhor receive a blasting and then some. The MoaH usually survives this, but any rockets or fusion ammo or shotgun shells you have left should be enough to bring him down. So, you've survived the final room. Now what? You'll notice some switches above lava that's sitting under pillars. Shooting either one will raise a platform in the southern lava pool, which will provide access to the final terminal. Getting goosebumps? Let's read:
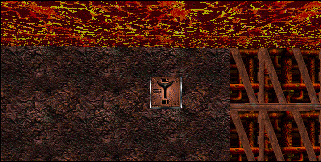
Seems almost like Bungie was setting itself up for a sequel to this game. As a matter of fact, that may well be what's in the works right now, provided the information in the leaked Bungie-Activision contract is still accurate. As soon as we finish reading the terminal, we are given a lovely ending screen. However, I won't show this yet, because we still have not covered this level's secret. And what an odd secret it is - get to the final room and you can't go back to find it, find it and you can't survive the final room. This means going through the level twice, once to find the secret, again to get to the end. Some have said it's almost as though Jason Jones (who made this level) replaced the sin of Colony Ship For Sale, Cheap with the sin of All Roads Lead To Sol. I'm not sure I agree with the first part of that statement (which assumes Colony Ship was a mapmaking sin), but I'll admit it was evil of JJ to throw in that caveat. He certainly seems to have an interest in irritating the Vidmasters. So, remember back when you took that dip through lava at point C on the map? Look under the lava there, and you'll find a switch. It looks something like this:
(Picture kindly provided by the Marathon Story Page itself, specifically the page about the Switch on Sol.) Hit this switch. It opens a door at the bottom of a lava pool at point H on the map. To get to this room, however, you'll need to do something else. Remember that panel I told you not to break because it would deactivate the chargers and Pattern Buffers you had passed along the way? Break it. It will open a door that leads into the lava pool room. Of course, you will want to have already charged up and saved your game, but this should be obvious. Now head to point H, where you will find the lava pool guarded by one or two Hunters. Drop down into the lava, and swim north and out. You'll find a narrow corridor, at the end of which is a 3x Shield Charger, a switch, and a bright panel on the floor. The switch causes part of the wall to drop down, revealing a nice window to one of the earlier Juggernaut areas. This 'window', if you'll recall, was actually a Pattern Buffer you encountered earlier in the level. Nothing much to do here except use the shield charger. Why don't we try standing on the panel, see if it teleports us anywhere? Sure enough, it teleports you to point I on the map. You'll want to hit the ground running, though, not only because there's a load of Pfhor around you, but also because you teleport in directly on-top of another teleporter, which will take you to the still-full-of-lava final room, where you will most surely die. Assuming you do manage to get moving before the teleporter can beam you out, you'll want to whip out those Shotguns you grabbed earlier and mow down the Pfhor here - there's a good number of them. Once they're all dead, you'll probably realize something's not quite right here... Something feels funny about this place...
Curiouser and Curiouser... not to mention the floating Terminal and Shield Charger:
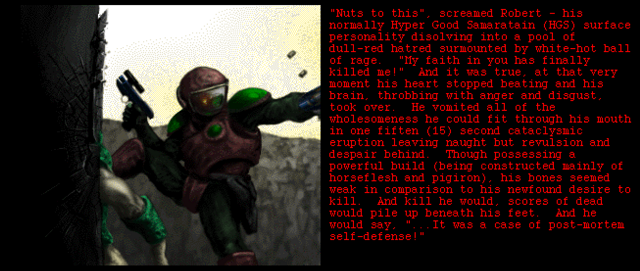
Let's read, shall we?
A strange tale... kind of reminds me of the M1A1 credits terminal.
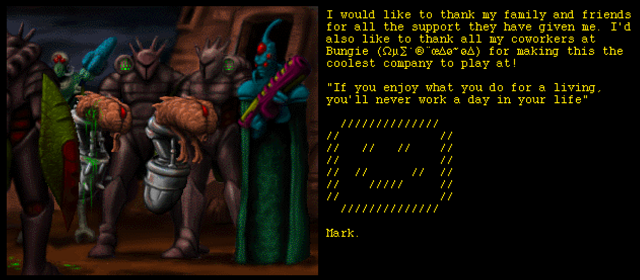
This must be Mark Bernal, one of the people in Art & Graphics.
Alas, 'tis gjk, Designer of Levels for both Marathon 2 and Marathon Infinity.
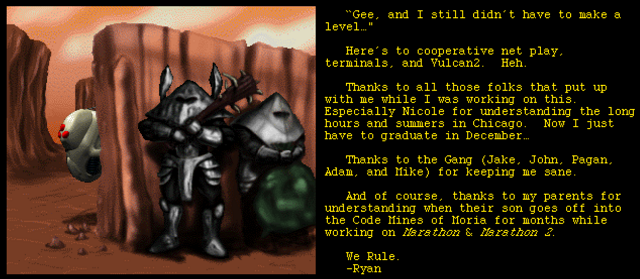
This would be Ryan Martell, one of the programmers for Marathon 2. Strangely, there are two puzzling references in here. The first is Vulcan2, which sounds suspiciously like the name of an application, if you ask me. The second is Moria, which only reminds me of StarCraft, a game that came out three years later, and thus could not possibly be the source of the reference.
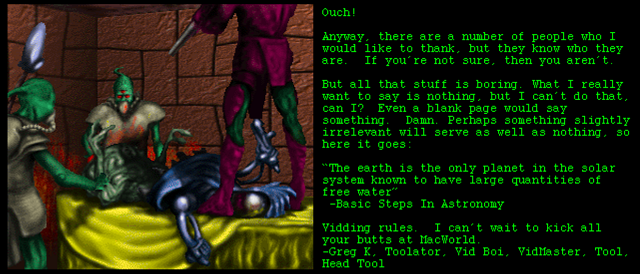
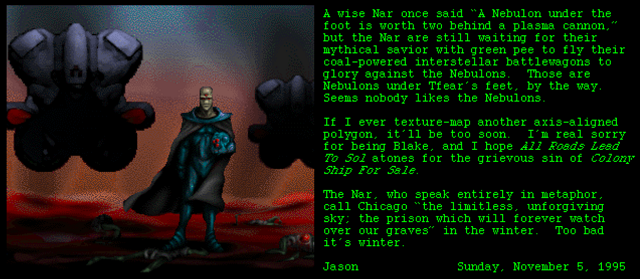
Ah ha, Jason Jones, master of Marathon map-making sin. Note the confirmation that the creatures in that picture are Nebulons, the very beings who described the Juggernauts as 'The Big Floaty Thing What Kicks Our Asses'. It would seem that the 723rd was involved in helping defeat the Nebulons as well as the Nar.
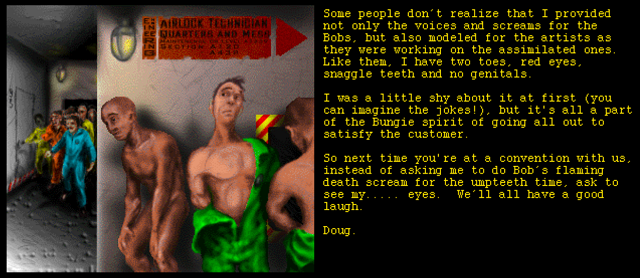
Doug Zartman, the infamous voice of BoB. All else is self-evident.
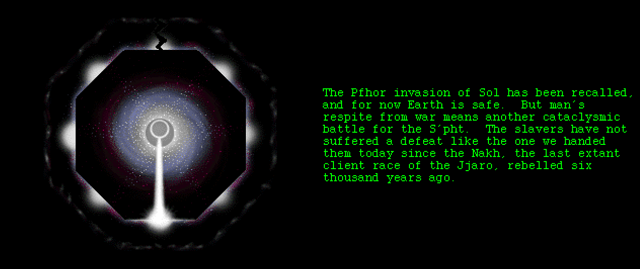
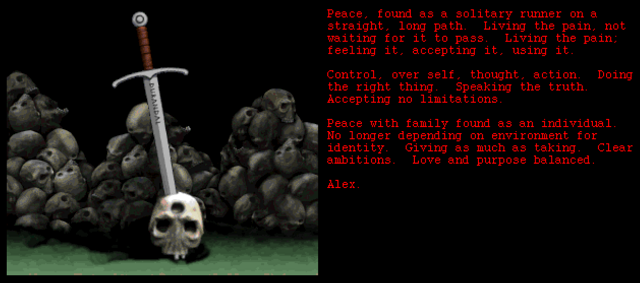
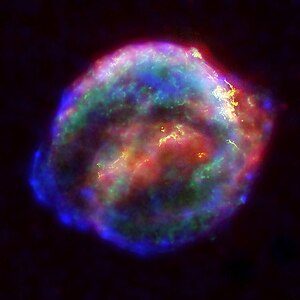
Alex Seropian, sound designer for Marathon 2, giving us a lovely [?poem?riddle] about life, control, peace, love, balance, etc. So, aside from reading this credit terminal, there isn't much to do here. We can always step on the teleporter at point I and let ourselves get roasted, but that isn't much fun. On the other hand, on Kindergarten, you could have also broken the panel that changes the lava levels and then run/swim all the way to the secret teleporter so that when you got there, the final room wouldn't be full of lava and you could finish the level. However, this is probably pretty tricky, and only possible on Kindergarten - the lava kills you faster on harder difficulties, making it impossible to get to the teleporter in time. At least this is the impression I get from the Vidmaster page. Speaking of the Vidmaster page, there's a number of really lovely films to watch for this level, fortunately provided in zip format for newer Mac users (I've never been able to use the sit format, oddly). The first is a pack of two films by Nicholas Head that show both how to complete the level and how to get to the secret, along with showing that there are actually two secret Juggernauts at the very start of the level that you can get to teleport in. The second is called 'A Short Road To Sol...', wherein Todd Keating completes the level in 4 minutes by using a series of fast grenade/rocket jumps to get across the lava lakes quickly. The third is a no-ammo run of the level (!) done by John Sumner. So we have completed the final level of Marathon 2. Bit of a let-down if you were expecting Ingue Ferroque 2.0, but still interesting none-the-less, with lots to explore. It's a bit like a brighter, more straight-forward version of Try Again, with Juggernauts above lava pools and lots of ammo and Shield Chargers. However, I think it's actually better than Try Again, both because it's easier to understand where you are in the level, and because it has more interesting secrets and story tid-bits in it. Durandal tells us we've saved Earth, and that the Pfhor are retreating in every way except one; they have activated the trih xeem, an early nova device that will turn Lh'owon into nothing more than an ever-expanding cloud of superheated gases, which probably looks something like this:
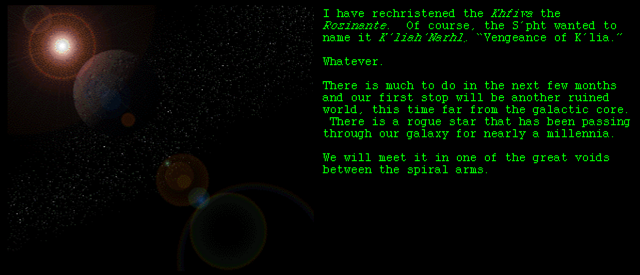
Needless to say, I think we'll want to take up Durandal's offer to leave this place and go searching for this "rogue star" he's on about. And thus we are teleported off this world, and into an uncertain future...
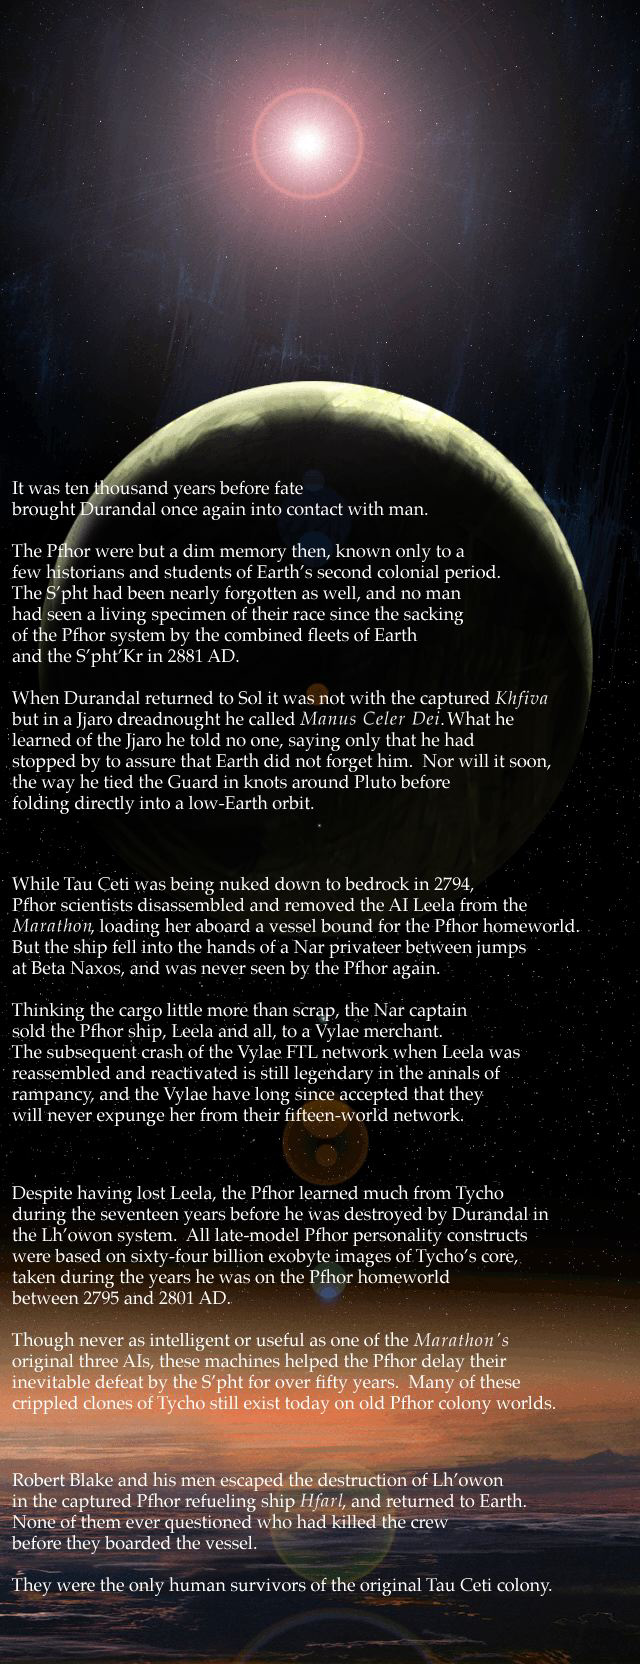
So, Durandal somehow gets a Jjaro dreadnought in the next ten thousand years, the phrase 'UESG' may refer to 'United Earth Space Guard' (see the UESC/UESG section), the Vylae are now in possession of a rampant Leela, there are a number of Tycho clones out there somewhere, and Robert Blake is a real person. Lots to learn here, but then again, is any of it true? This next game Martin's going to be taking us through suggests that perhaps not everything is as it seems{}. seems{}. seems{}. What is the real Tru7h? Will we ever know? What is real, what is not? Who do we trust, who do we not? And why does Jjaro architecture feel very... human? Will any of our questions be answered? ... Should I even ask that? For now, Goodbye. Vale,
| ||
|
| Replies: |
| Tour of Duty - All Roads Lead To Sol... | PerseusSpartacus | 12/30/13 3:55 p.m. | |
| Re: Tour of Duty - All Roads Lead To Sol... | Martin | 12/30/13 11:58 p.m. | |
| Re: Tour of Duty - All Roads Lead To Sol... | Martin | 12/31/13 7:49 a.m. | |
| Re: Tour of Duty - All Roads Lead To Sol... | PerseusSpartacus | 12/31/13 8:05 a.m. | |
| Re: Tour of Duty - All Roads Lead To Sol... | Hokuto | 12/31/13 9:34 a.m. | |
| Re: Tour of Duty - All Roads Lead To Sol... | VikingBoyBilly | 12/31/13 2:41 p.m. | |
| Re: Tour of Duty - All Roads Lead To Sol... | Martin | 1/1/14 12:21 p.m. | |
| Re: Tour of Duty - All Roads Lead To Sol... | Godot | 1/4/14 12:52 p.m. | |
| Re: Tour of Duty - All Roads Lead To Sol... | Martin | 1/5/14 3:49 p.m. | |
| Re: Tour of Duty - All Roads Lead To Sol... | PerseusSpartacus | 1/5/14 4:05 p.m. | |
| Re: Tour of Duty - All Roads Lead To Sol... | Martin | 1/5/14 4:47 p.m. | |
| Re: Tour of Duty - All Roads Lead To Sol... | Martin | 1/5/14 4:59 p.m. | |
| Re: Tour of Duty - All Roads Lead To Sol... | VikingBoyBilly | 1/2/14 5:55 a.m. | |
| Re: Tour of Duty - All Roads Lead To Sol... | Godot | 1/2/14 7:15 a.m. |
|
Problems? Suggestions? Comments? Email maintainer@bungie.org Marathon's Story Forum is maintained with WebBBS 5.12. |