/-/S'pht-Translator-Active/-/
|
|
/-/S'pht-Translator-Active/-/ |
| Tour of Duty: Brain Damage | ||
| Posted By: Martin | Date: 8/16/15 3:57 p.m. | |

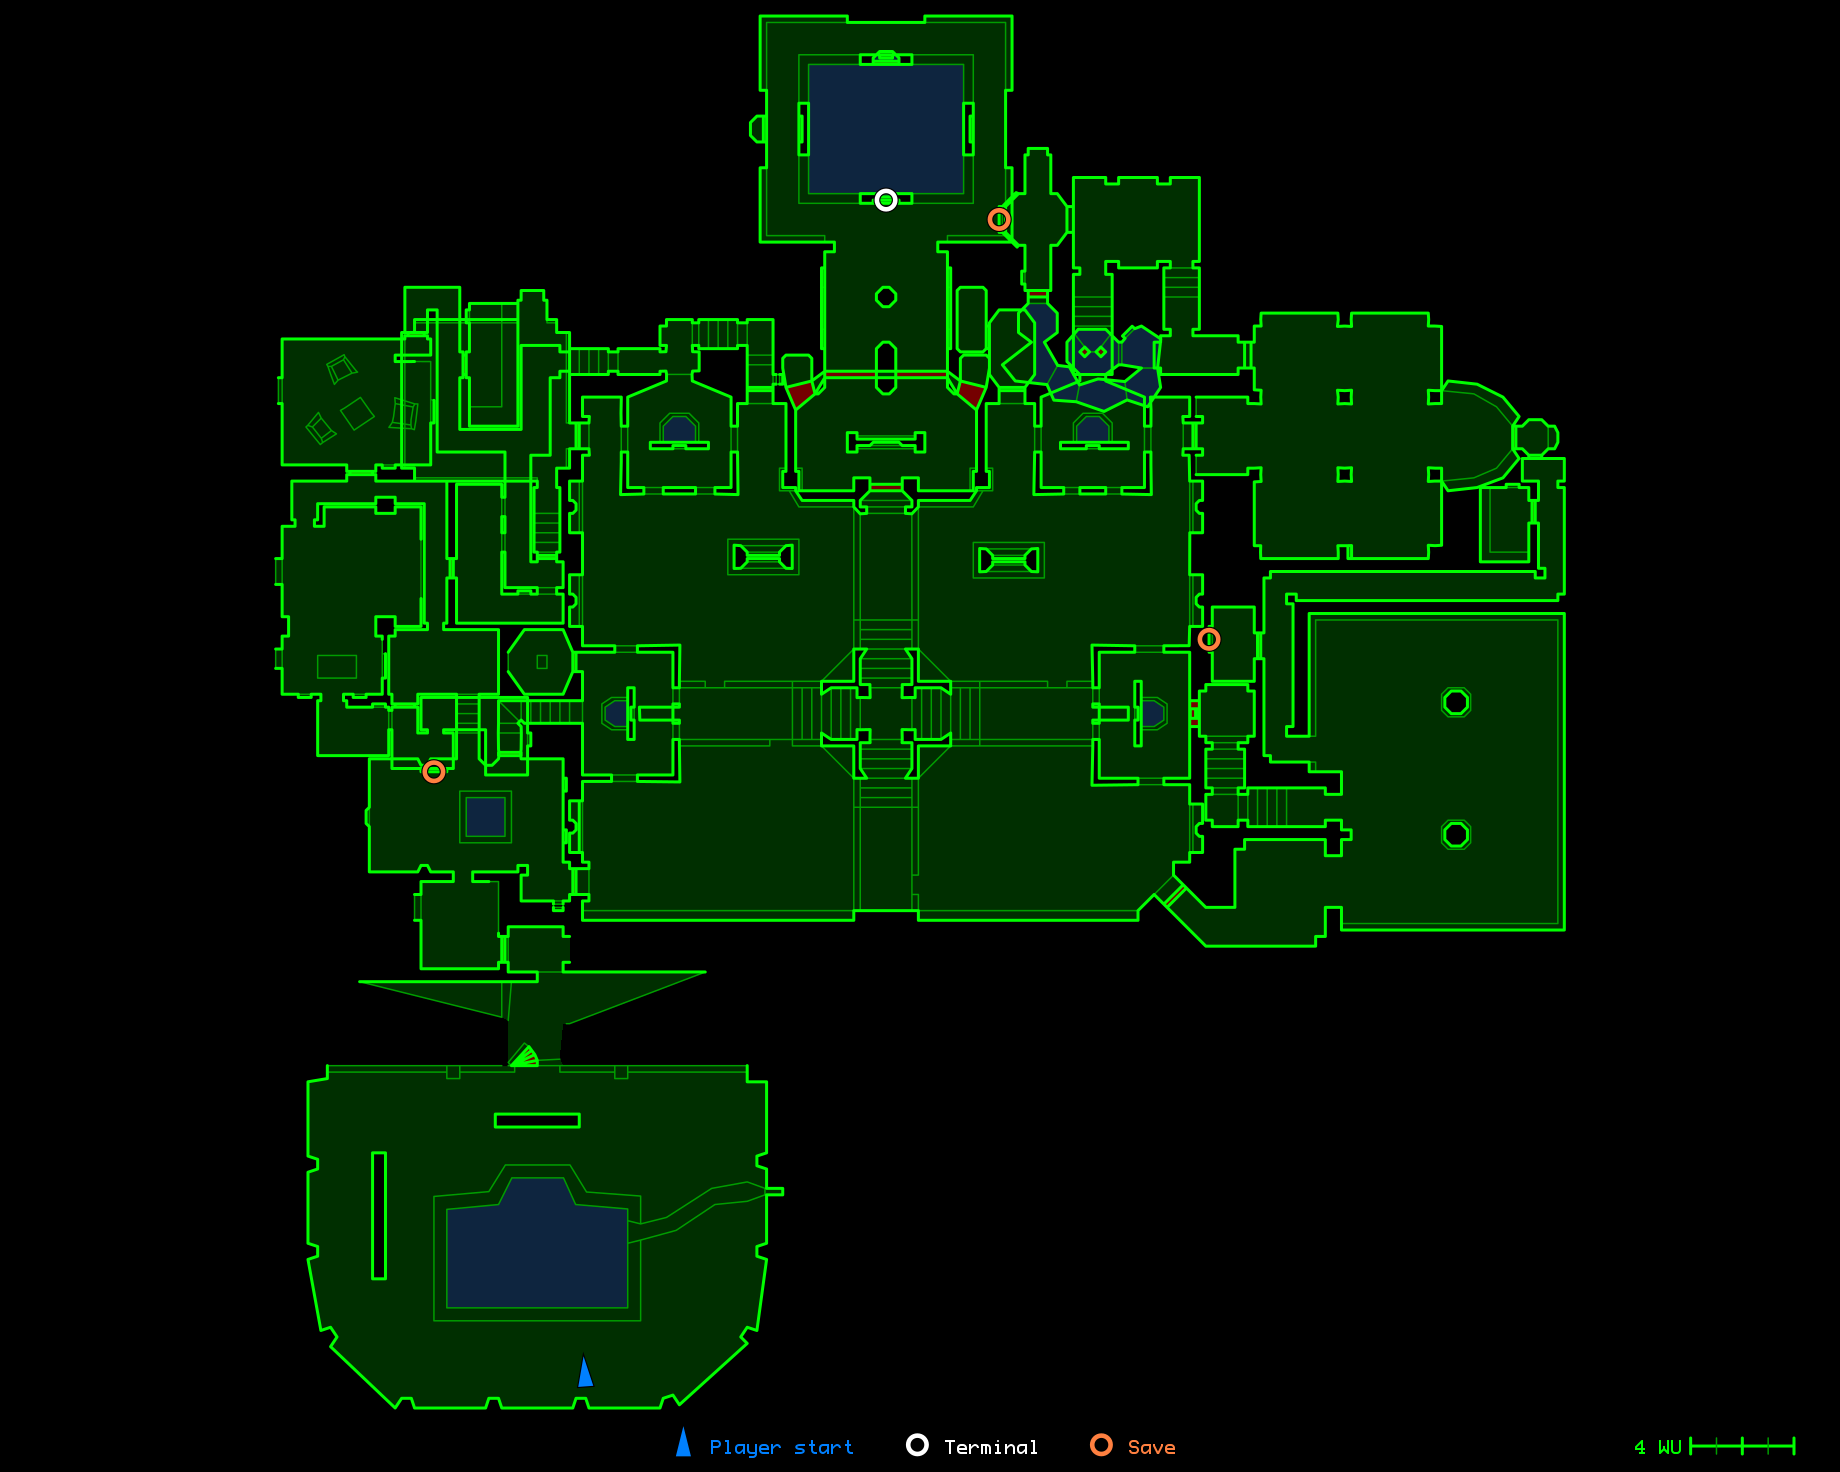
Tempus Irae 8 Brain Damage Last time on Tour of Duty, we covered three levels! But that was a while ago :(. One was a switch and bait level, as over and over we flipped switches and ran around to find out what they opened. The highlight was definitely the camoflaged staircase, a real headscratcher first time around. There was a secret exit to that level, which also sorted us out with a little invincibility, and thank goodness, because that level was more of a carnage gauntlet, and the only objective was to escape, which we did, after availing ourselves of a SPNKR and various other goodies. And finally we found ourselves in the relative and absolute peace of the Repository Room once again, where we deposited our latest book, and read an awful lot about Pfhor bureaucracy ŕ la Infinity. That terminal turns out to be quite annoying when we realise just how hard is the beginning of today's level, Brain Damage. When I first set out to write this up, I couldn't get a foothold on the level on TC and lost interest for a while. This time I've taken it down to Normal, and even then I just managed to die, so I've come back out to put pen to parchment, as it were. We begin in a large courtyard with a bunch of trees, hedges and statues, a bunch of ammo surrounding us, and various Pfhor already present but sleeping - closest to us, a Trooper. Waking him up brings the whole place to life, and as we run around the place, we find Fighters, Drones, more Troopers, and most annoyingly, an Enforcer. TC really does make this painful, and if we just make a run for it, we are met by plenty more resistance. Cleaning up the place we can also find an assault rifle in the water feature that this courtyard revolves around. Something for the vidmaster. Small mercies! And then our way out of here is a door behind a hedge that opens in an arc, similarly to the ones in the cathedral a few levels back, but somehow even more impressive. Then there are more Troopers and Fighters as we progress through a few inside rooms, and then come to one with a raised area in the middle with water and a tease of a shotgun; I wouldn't want to waste the shields grenading myself up there :). There's also a Hunter that spawns here, which doesn't help. And there's a door that requires a key, a door that is just slightly open off the floor, and a staircase that we can actually proceed up. At the top is a 1x shield recharge canister, well received but not really enough on TC. And if we hang around, a Trooper comes down the corridor that carries on, towards us, and he just laughs at 1x shields! Advancing into the corridor also has the happy effect of spawning more Projectile Fighters behind us, almost predictably for this scenario. A door to the right takes us to a room with windows onto another corridor, and a switch that opens a door in that area, which we can't quite reach yet. Pfhor make this all the more interesting, and another 1x canister and some ammo make it slightly less mean. Back in the corridor after that we find doors that won't open and then we open out onto a room with Fighters and Troopers. Advancing into it hurts not only because of them, but because it seems to call still more of them from down the corridor we just came from! And there we go I just died again - remember what I said about that Repository Room terminal being annoying? Yeah, well that's because we have to scroll through 10 pages every time we die here! And then the game decided to revert to being TC, but I showed those Pfhor! Beyond that large room is a very small one, with a switch that opens a door just through a window - at least this time they are a bit more blatant about it! Of course we still have to recognise where that door -is-, and it turns out to be back at the top of the stairs; I just neglected to mention it at the time. Behind it is a Trooper, and then a few turns before we come to a switch and an odd wooden plank on the floor. But before I discuss that, walking into this room also reveals our first Pattern Buffer, just back out of the room. The switch reveals that the wooden plank is actually a platform, which raises almost to the ceiling, suggesting that something underneath has been moved out of the way - handy! The platform causes some texturing issues - if you stand next to it by the switch, you can get the whole screen to go black instead of seeing the wall, or you can see straight through the platform itself. Map stuff like that is always a bit freaky. So, what was underneath? Well there was that brief mention of a door that was very slightly open from the floor, at the bottom of the staircase, and while it doesn't seem like it, we are actually above that here! So we head down and find that another staircase has been revealed. At the top of this one we get really up close and personal with an Enforcer, and get shot at from a distance through some windows. There's some ammo and a 1x shield recharger, and a central structure in this small room hides a switch on its back side. This opens a door that we suddenly notice right next to where we came up the stairs, and inside are some Fighters guarding a key card, which means we can finally open that door back downstairs. Through that door we head outside, into a hedge lined courtyard and something of a gimmick for this level. We can enter a water channel that is one of four with stairs ascending to a central platform with an Enforcer, so a cross-like arrangement, but only the channel nearest to us here actually has water in it right now. They will all eventually be used to access new parts of the level, by swimming and climbing out, but for now all we can do is head left through the close one, after dealing with the Enforcer and also a few Fighters in the spot we're swimming to. Let's have a look at the map to see how this actually all appears. The new map style courtesy of Hopper at lhowon.org - thanks heaps for that!
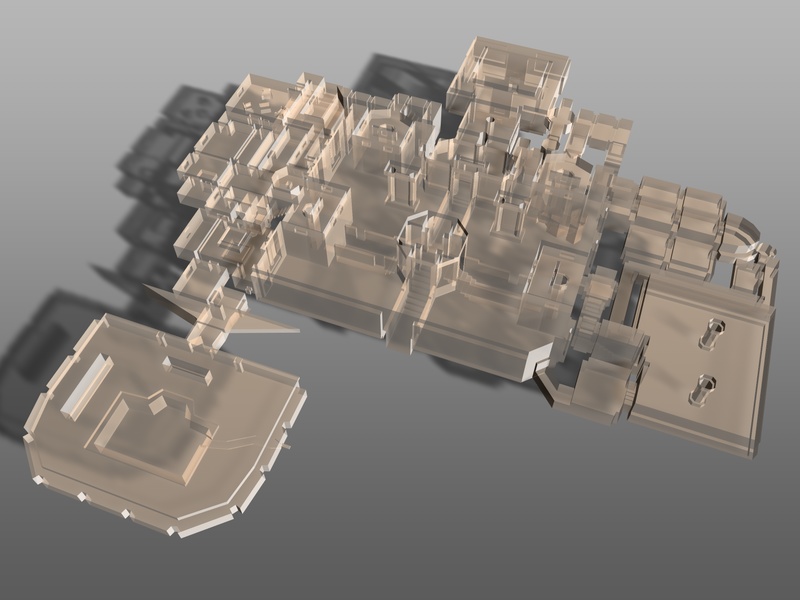
And the 3d map, still from nardo.bungie.org :).
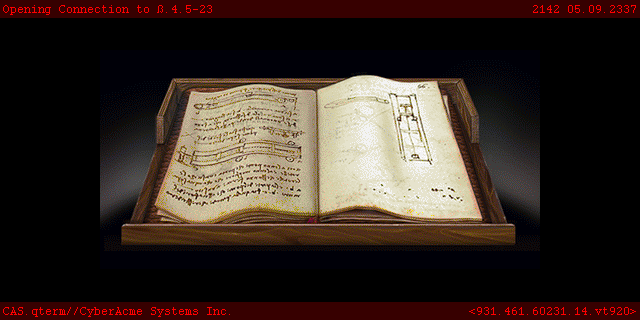
From the former, is there actually a time when all four channels are drained? Anyway, we really haven't seen much of the level yet, and we're heading back around to the left side again too! The second courtyard has some more Pfhor, and a door that looks inviting but does not open. Instead there's another around to the left. From the map we can reasonably clearly see the rooms we will be visiting to change the state of the water channels - did that first switch also fill the first channel then? I guess so. And the Nardo spoiler guide talks about doors being locked to prevent attempted cheating by crossing empty moats. Nice touch :). Inside we find a large tiled room with Pfhor, and another uncooperative door to the right. Left we go upstairs once more, and go through what was once a door through a window - we opened it earlier on! So we're tight in beside what we were calling upstairs not long ago. And indeed, on a bit we can go to the left and follow a corridor to a largish room with more uncomfortable chairs, more Pfhor including attacks from behind yet again, another key card, and a switch to officially join us up to the old upstairs area. I really like that just for the aesthetic - how they join it all together - but I guess it also gives us quick access to the pattern buffer. The other way, back down the corridor, heads us to the switch for the next water channel, again via ambush attacks, just so we don't feel left out. The key card turns out to be for the door we couldn't open from the courtyard - now we can, from the other side, after just one more attack from behind. They really lay it on thick for this level! So now we have another channel full of water, directly opposite the first, and so another courtyard and more rooms to explore! The pattern is similar insofar as there is a door we can't open and a slightly less obvious one that is already open. The Enforcers in the water switch rooms also seem to have delusions of grandeur about their ability to hit us from above, maybe something to do with map tricks? They do say this was one of the hardest levels to make! First off here, I had to look up the method to access the nearby secret - beyond that door we couldn't open just before. It's a trigger in the corner just by the opening we're about to go through, but the door barely stays open long enough for us to get through it. When we do, we find an invisibility powerup waiting, and another secret door nested within holds a 3x shield recharger, a Tozt, and some ammo therefor! Not too shabby. Back to the non-secret next room, another large tiled one, and we can see a key card in the distance, but it is of course -way- too quiet. And it's not just Pfhor that surprise us as we head towards it, but the fact that we actually can't reach it - it's a beyond a couple of windows with a dropoff in between! So mean :). We do get a 2x shield recharge canister though, so it's not all bad, and if we just run outside again, the Pfhor won't follow through the opening. It is not obvious where we go next - there's a well hidden switch in a panel on the right-hand wall in this room, and it opens a door in the wall diagonally opposite - one that was just wall textured, to make it even more cryptic! Again we head up some stairs, but we're in quite a different place now. It seems to be another dead-end - an opening we can't fit through at the top of the stairs. But our presence there opens a door just back down the stairs, revealing some Hunters and another Pattern Buffer. There's also a 1x shield recharger and an oxygen recharger. And then there are doors we can't open, to the left and the right! Once again there is a well hidden switch for the one to the left, right there on the wall but not at all lit, such that I missed it and started heading back - good to know these are puzzles that are easily forgotten :). The door reveals a waterhole, so that explains the oxygen, although maybe not fully. The spoiler guide talks of how they removed a much larger underwater maze when at the behest of testers, and this isn't much of a swim right here. It plays with ceiling and floor levels a bit like on Confound Delivery, but there's nothing to kill here, and looking at the map we can navigate fairly easily with the swim key. We soon reach a switch that doesn't switch, and so we try to smash it to pieces instead, and that works well - a window shows us a small platform descending from above, enlarging the opening we couldn't fit through earlier, and making it so we don't need a Drink Me potion! And just beyond is the next switch room, allowing us access to the southern water channel, courtyard, and associated rooms. The first is large with two columns, plenty of Pfhor, and another 2x shield recharge canister. This time the Pfhor not only don't follow us back outside, but actually head off up a staircase if we leave them to it. And it's easier to fight them that way, in a narrow corridor :). Up that staircase is another keyed door, although this time the keyhole is right on the door instead of next to it, a setup that was apparently very hard to implement. Clearly we can't go that way right now, and there is another way on from the large room. To a narrow and rather low corridor in which you'd think you'd have trouble fitting a Blue Hunter, but OMG there's one coming right at us! The corridor situation seems to make his blast radius somewhat bigger, and just in case that wasn't annoying enough, his brother (right? :)) comes at us from behind. And their powers combined just killed me, so back we go! Slightly typically, a door just to the left of where we fight them holds a Pattern Buffer - thanks a lot guys! Okay, so it seems the first Blue Hunter was actually originally in the large room, but his retreat was down that corridor instead of up the stairs. Complicated! Continuing down the corridor after surviving the blasts, we find another door off to the left, with ammo, another 2x shield recharger, and a switch. The map reveals that we are just next to the mystery of that key card from earlier, and at the end of the corridor, we can indeed open another window onto it, showing that that switch just opened up the way to it ... but from the other side, so we're backtracking! Returning with the key card we can of course open that clever door and flood the last channel. The spoiler guide said that the door opening in several bits was partly to give the Enforcer time to hit the player uncountered, but it was around by the windows for me, out of sight. I had to reload a few times just after this, and I eventually found it as they described :). Also interesting is that you have to be very accurate with where you tab, as the bits of the door next to the keyhole will just respond as still locked. And once more, say it with me, there's an attack from behind - well, a Trooper back down the stairs, but it still qualifies! And we've still got the nastiest of all to come. As we head to the north channel all victorious like, another Enforcer spawns on the central platform! And that's just annoying. We -can- just ignore it, as we head around the corner just after the entrance, but there's a lot of fighting coming up, with probable need for retreat, and anyway, it is very interesting just how painful the Enforcer is to kill. Trying to head up to the platform and using the water as cover is problematic, because it's not very deep as we get closer, and we actually get hit; and then the stairs are steep enough as to delay our approach, while we're still being shot at. There is the distance option, of course, but I have to say, well played! And then there's the fighting in the north. We go around a wall and hear Pfhor beyond some closed doors, which open to reveal a lot of Fighters. As we work to kill them, two more doors open to reveal Hunters! I'm not sure of the trigger conditions for those, but suffice it to say they are not welcomed! And finally we head towards a pool room. There's a 1x canister, some Troopers, Hunters including another Blue, and the first Drones since the very first courtyard. And they have no issues about following us in retreat, all the way back to the water channel! The only terminal for the level is also here poolside, again now courtesy of lhowon.org!
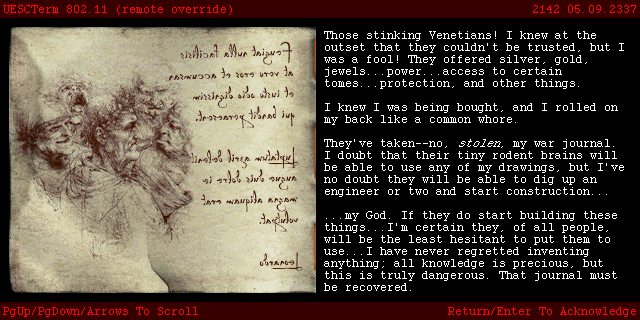
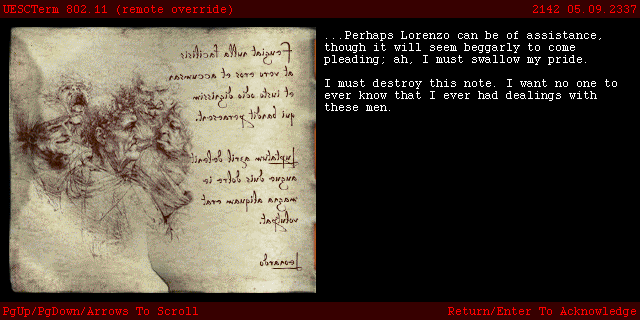
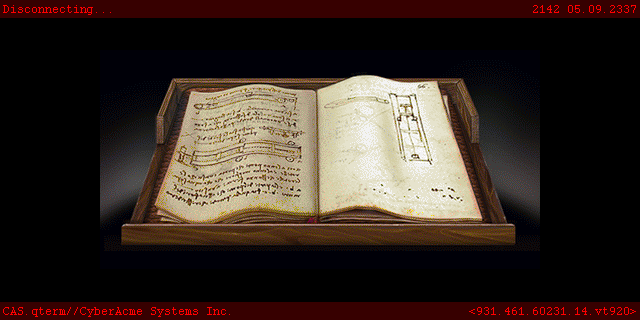
A rather heartfelt Da Vinci concerned about his War Journal having been stolen, as in the details of all of his inventions, and about what might happen if the various machines were to be constructed. Well, we're very much in the business of recovering manuscripts, so I guess that's next on the list! Now, to end the level, we have options! There is an L switch on the north side of the pool, underwater, which reveals a teleporter to the south. But there's also an L switch to the north on the back side of the wall, -not- underwater, which reveals a teleporter to the west. And it is -that- one that is deemed "secret", and takes us to our next port of call, Towel Boy, for which your Tour Guide will be VikingBoyBilly!
| ||
|
| Replies: |
| Tour of Duty: Brain Damage | Martin | 8/16/15 3:57 p.m. | |
| Re: Tour of Duty: Brain Damage | VikingBoyBilly | 8/17/15 6:37 a.m. | |
| Re: Tour of Duty: Brain Damage | Martin | 8/17/15 12:50 p.m. |
|
Problems? Suggestions? Comments? Email maintainer@bungie.org Marathon's Story Forum is maintained with WebBBS 5.12. |