/-/S'pht-Translator-Active/-/
|
|
/-/S'pht-Translator-Active/-/ |
| Tour of Duty: Polygonium Opus | ||
| Posted By: Martin | Date: 6/17/15 3:18 a.m. | |

Tempus Irae 6 Repository Four & Polygonium Opus Last time on Tour of Duty, we found the Sistine Chapel, and ran around the larger surrounding complex, finding switches, opening doors, raising lava, and raising hell! We came to a slightly confused ending as parts of the level were left unnecessary when we had already triggered the less than obvious final door. The very last moment was also curious, as a health canister spawned opposite the L button, and ammo spawned by the wall just as we entered the teleporter. Why is that curious, you ask? Well, because Repository Four starts us off with no weapons and on rather low health ¢ itÆs one of those whatchamacallit levels. Seriously, Word actually knows that word, and corrected my putting ōmeö in the middle there, and it lists synonyms: thingamabob and thingamajig among others. Such fun! Anyway, as such it also has to spawn the uplink chip / manuscript that we need to insert. Appropriately, the fourth one. 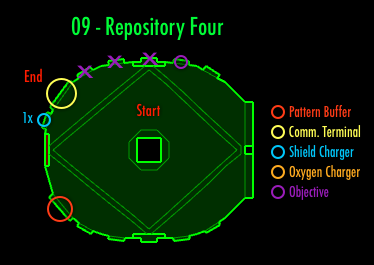 Generously, it also gives us a Fusion Pistol, dual Shotguns, and some ammo. There is also the usual 1x recharger here, so we can solve all our problems as long as we remember to. If we hit the terminal without returning the manuscript, we get a slightly different from usual message ģ but we already knew something wasnÆt right from the state we arrived in.
I guess something went amusingly with the teleportation, and all of our stuff, or a minimal approximation of it, somehow became separated from us. So, letÆs find out whatÆs up ¢ manuscript deposited. Conveniently, this is the first Repository level we can successfully start a new game from! And with the weapons it gives, weÆd be fools not to.
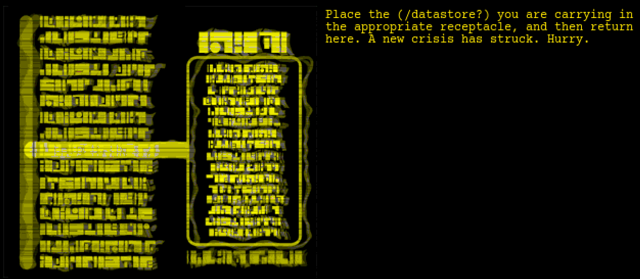
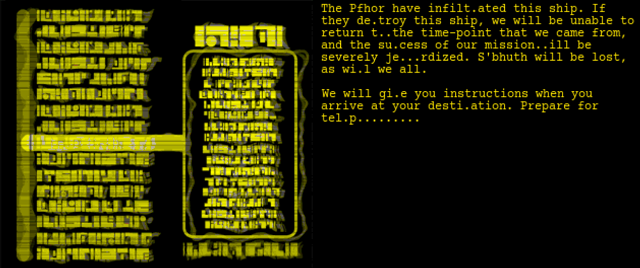
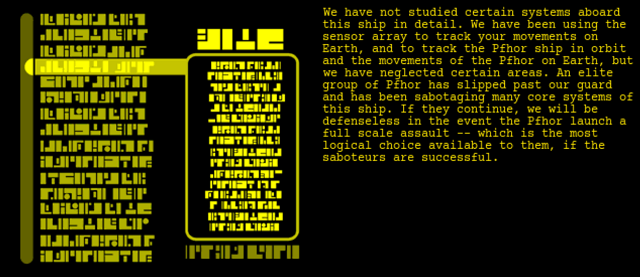
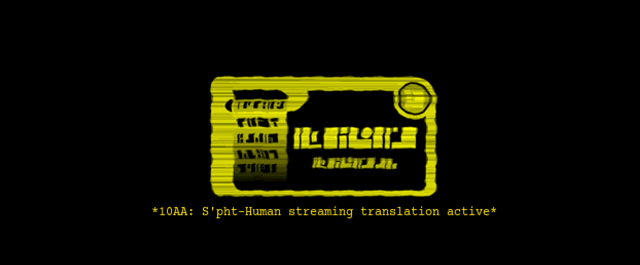
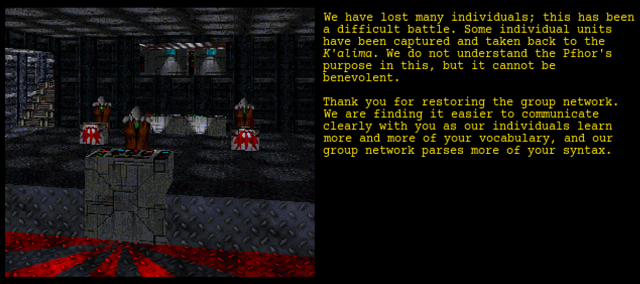
ItÆs like Wheel of Fortune. IÆll have an R please, and could I buy a vowel? And this stuff is pretty obvious ģ actually makes me think of https://www.youtube.com/watch?v=jaUkt59vY1Q for a laugh. Or the first minute of https://www.youtube.com/watch?v=Z9IflKSwTFM ¢ man how does that stuff stay up? Anyway, we can be pretty sure the Pfhor are attacking the ship weÆre on ¢ the one we started on ģ so we should recognise it, right? Wrong. ItÆs more of a Ne Cede Malis to your typical Aye Mak Sicur, if you will. And so for a change, weÆre not going back to Earth, but elsewhere on the ship. As we arrive, with Earth still visible out the window, a terminal rises up out of a panel. More information already! And instructions the likes of which we havenÆt seen in a while! And at least they sorted out the shimmering in that logo.
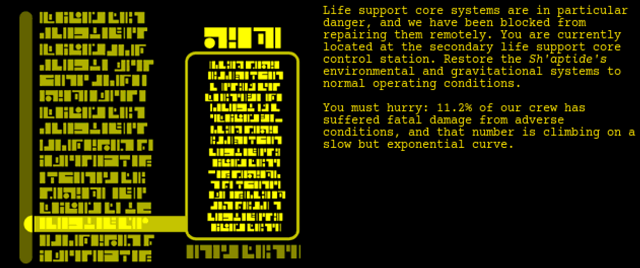
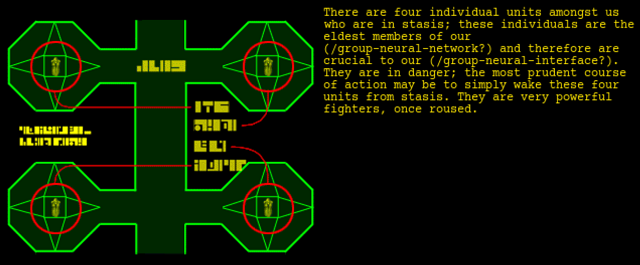
OMG too much detail, can we cope? So I guess the SÆpht canÆt be monitoring everything at once, and some Pfhor are attacking the ShÆaptide, and maybe preparing for a full-on assault, if the Pfhor are indeed logical. And life support systems are not doing so well. Hmmm, I guess that is what the switch in this room deals with off the bat, as well as hitting the lights. I think itÆs fair to see we take slight issue with the concept of a slow but exponential curve, but maybe it was lost in translation ;). There are four SÆpht elders in stasis: bring out the SÆpht. But the SÆpht are sleeping ¢ well I guess youÆll just have to go wake them up now wonÆt you! Where waking them up might just be a matter of punching them. I mentioned a switch, and there are actually two right here ¢ one activates the other one as well as everything else, and the second one brings a lift down with some Fighters attached. Black ones. Conveniently there is also an assault rifle down here, and some ammo. We smack the Fighters and head back up, to find a pair of Troopers bearing down on us; shotguns or AR come in well handy, but itÆs still annoying in the cul-de-sac we find ourselves in. We might be able to get a nip of shields back from the 2x charger right in front of us up here, before the Troopers can hit us, because this corridor we are now in is more like an obstacle course, but itÆs a risky business in case they get a decent hit. With those two dealt with, we can relax in this corridor briefly, and find a pattern buffer in addition to the 2x shields, this is a turn up after the lengths weÆve had to go to for pattern buffers in recent levels! ThereÆs also a partly open door, but open from the top instead of the bottom, just to be different from Arrival. We can see a Fighter behind it, and kill him, with some clever grenading ¢ otherwise if he happens to wake up, heÆll be plaguing the radar for a while to come. To the left there is a locked door, so our only way out is around to the right. I guess letÆs have a look at the map and try to work out where that is. 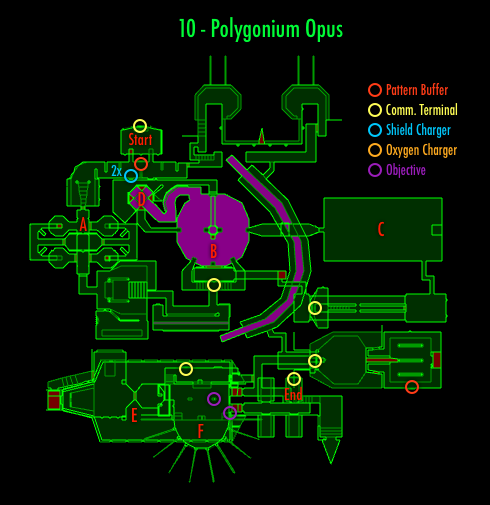
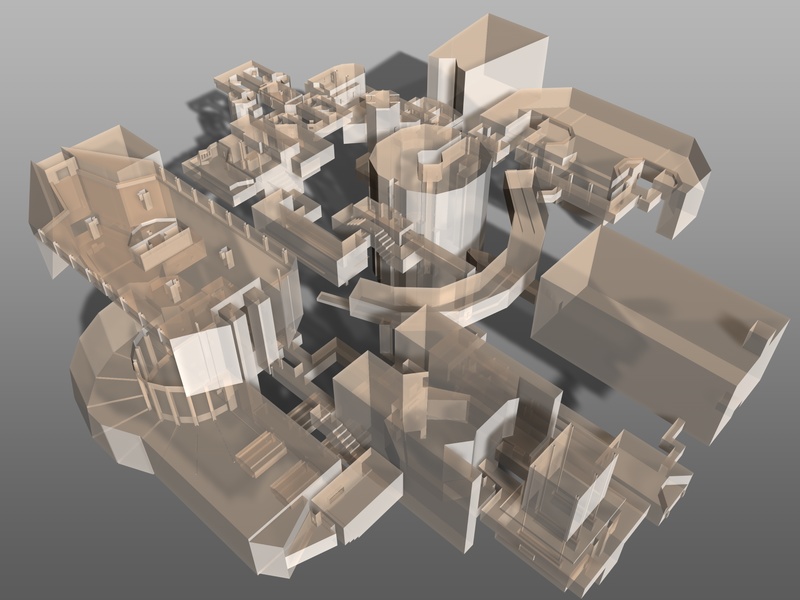
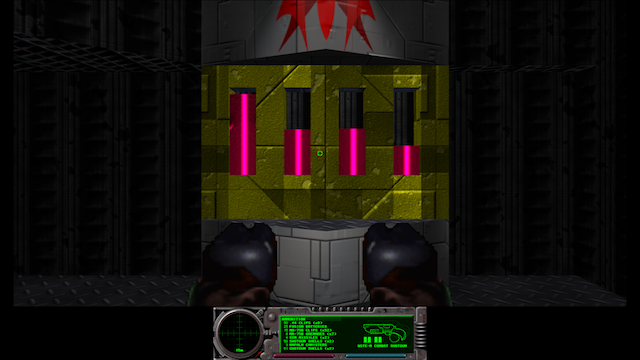
This level is big, and I always thought that the name was just referring to its having a really large number of polygons, but their guide says it is actually a historical term for the art of polygonal masonry. And itÆs such a nice fit given that the scenario is set historically, but here we are in a frickinÆ alien spaceship! And as I said, itÆs large. The 2d map is actually remarkably satisfactory for most of the level ¢ somehow thereÆs not as much overlap as I kind of assumed. The 3d map is also really nice, and shows off quite a large range of heights! ItÆs one of my favourite levels of the scenario ¢ I think that like with Kill Your Television, it feels totally hopeless the first time through, but when youÆve cracked it, it feels like a real accomplishment. So around to the right. There is a set of stairs leading to a locked door, and some Fighters shooting at us from ledges on both sides. When we get up there, we find a switch tucked away on the right-hand ledge, and the door opens. This also spawns more Fighters back in the corridor we came from, just in case we thought we had an easy path back to the 2x shields. Through the door, already we find ourselves among those sleeping SÆpht elders ¢ weÆre at point A on the map here! IÆm seeing inconsistent behaviours both among and within the difficulties. For a start, on the level in general, all Fighters are black and all Troopers are grey, but here the SÆpht are all a nice blue colour on TC, but some are red on kindergarten ģ or are just not there at all. There are switches in all four of the stasis units here, but only the one in the far left room seems to do anything. This time when I walked in to the close right room, I saw the platform descending and crushing the SÆpht. I didnÆt realise that was what happened; I guess itÆs all timing. That one is also the only one without its own door, maybe to show off that effect? They all have Pfhor hiding behind the SÆpht platforms also, just to keep things interesting. As I mentioned, we can wake up the SÆpht by just punching or shooting them. Then they can be quite useful, or not, in typical Marathon ally style. The important room is the far left one ¢ we can wake the SÆpht, stand on his platform, hit the switch behind, and ascend to the corridors above. There we find some more ammo, more Pfhor, and a strange middle room that locks us in with two Fighters, and requires us to hit a switch to get out. Then we descend again through what was the far left room from our earlier perspective, and somewhere along the line, all the doors opened, including one to further into the level, and the SÆpht woke up and are attacking more Pfhor. We pretty much just take it in our stride, and head back out to ōthe playerÆs deadliest weaponö and 2x shields. Carrying on we find a room with a barrier up front and some Pfhor to shoot on ledges. Shades of HaloÆs obsession with taking cover all . the . time. I quite enjoyed the bit in the new Doom reveal where they said Doom is not about taking cover. Neither was Marathon! There is a staircase that almost goes up to the ledge the Pfhor were hitting us from, but it takes a jump to the right ģ albeit no step to the left, although we certainly are doing the timewarp. That explains why they werenÆt coming down to engage us. There was an Enforcer up there for a change, who seems to be dressed in as close to grey as they could manage on TC, but just the usual blue on kindergarten. There is a switch on the ledge to the left, but it doesnÆt activate until we hit one around to the right, in a curious room with a trench. We can here Pfhor goo already, but it isnÆt there yet. ThereÆs some fusion ammo, and around beyond, a switch, and what yields our illustrative screenshot for this level: goometers as dubbed by PS.
The switch gets them going, and fills the trench with goo. If we jump in there, we get teleported to one of the raised spots in the previous room, and find ammo up there ¢ thatÆs a bit of a staple of this level, ammo in harder to reach spots. We also find a cyborg spawned out there while we werenÆt looking, and that the switch to the left is now also available. And it effects the most fascinating thing weÆve seen in a while ¢ the upward staircase turns into a downward staircase! And thereÆs our ticket to progress. Going down it spawns Fighters behind us, no surprise, and carrying on, we find a Trooper and then a tracking cyborg guarding a 2x recharger (not marked on the map) and some ammo, including a napalm canister, in a room with another goo trench ¢ and to all of that I ask ōwhyö? There is no Tozt, and we have a clear path back to the pattern buffer now, where we really should go soon, so why another 2x recharge? And why the goo trench ģ well, no one expects the goo trench. And this one isnÆt even wide enough to fall in. Back out of that room we find a terminal down the next corridor!
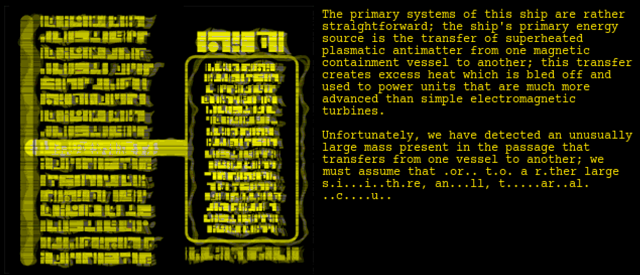
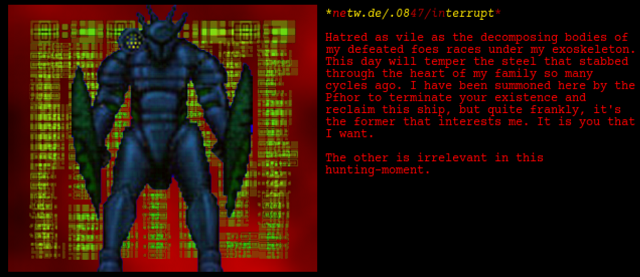
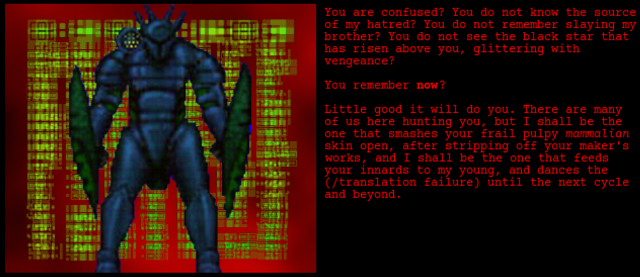
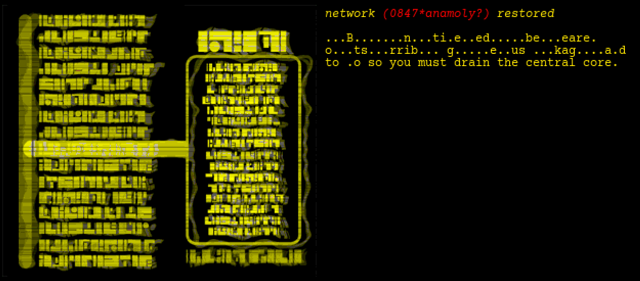
Oh damn, the shimmering is back. And the Wheel of Fortune stuff, but this time IÆm stumped! It does come as a bit of a relief though, as that sci-fi technology lesson was hurting my brain. Superheated plasmatic antimatter between magnetic containment vessels eh? Straightforward you say. Good for you! And then suddenly weÆre in the middle of a Pfhor Western, with a blue Hunter saying ōYou killed my brother: step outside!ö It makes me think of some secret dialog stuff in Halo, where several Grunts will tell strange stories if you do things in a certain way. In English, of course. At least this stuff is pointed out as being translated. I love the phrasing ōthis hunting-momentö ¢ they seem so formal! And much like the SÆpht joke, we donÆt get to see the name of the Hunter dance lol. And finally, a whole lot of garbled stuff but thankfully the minimal words of our goal made it through unscathed. Drain the central core. Neat. And by the looks of things, thatÆs just around the corner! Indeed, both ways from here take us to overlooks on a large pit of goo, at point B on the map. There are a few other stepping stone entrances around the place, and our next port of call is ģ another jump to the right! ThereÆs a Fighter off to the left who tries a few shots at us before heading off to patrol his currently dead-end corridor. HeÆs best dealt with now, or he might be a pain later. Grenades are the best medicine. There is a middle platform with a 1x recharge canister, but thatÆs not much of a temptation at this point, and jumping up there doesnÆt tend to end well. And as I said earlier, we should probably save before carrying on from here, because making the jump is not a sure thing. When we do make the jump, we find a shiny new pattern buffer, but just in case. We also find another switch, which opens a door into a large dark room. At the far end, our blue Hunter usually rises on a platform quickly out of reach, before we can deal with him. Indeed, the guide says thereÆs nothing we can do about it, but the Rampancy boys managed to kill him up front, and in one of my loads, he came right out towards me, so everything is not necessarily as it seems. Our little hole here is scant cover to wait for the Troopers to come to us, and thereÆs no point anyway, as we suddenly find we are also cut off from our pattern buffer by an obnoxious platform. Okay so a little testing just confirmed that we can actually cheese this by remaining right next to the pattern buffer and grenading the switch. Then the Hunter goes nowhere, and on kindergarten we can kill even him with one overpowered fusion bolt, wow! But itÆs probably not a great idea on TC, due to the cover thing. And we would also miss the rather attractive design of the room, wherein only the squares on which the Pfhor are placed are lit up. Moving on, we find a little path out of the massive room, and it doesnÆt have any ammo or anything to show for itself! Shades of the Defend THIS! crusher. The little corridor takes us to some Fighters and another one-switch-activates-another mechanism. We can also run straight past the Troopers into this area, but they do come to find us. The switches open a door between two force-field walls, and permits us access to the corridors behind them, halfway down the narrow central corridor. These connections really confuse the Pfhor if we get them close ¢ they seem to lose track of us. ThereÆs nothing to see in there just yet, rather we head down the stairs at the far end of the central corridor, to be greeted by Fighters, a Trooper, some ammo, a terminal, and a switch.
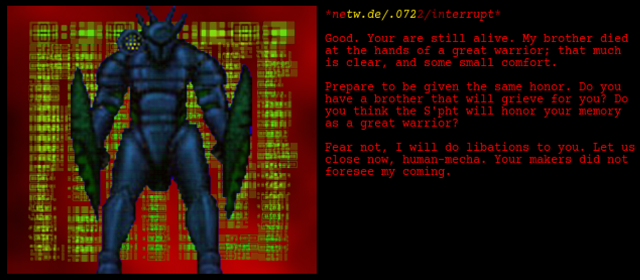
So even if we killed our Hunter in the previous room, here he is again, in our terminals, shimmering our logos. And having just chickened out on that platform, he now says he wants to fight it out! Well, I guess when we find him again. In the meantime, weÆve got a switch to hit, and then weÆve got to find out what it does. And it turns out to open a door at the far end of the corridors just above us, where they intersect again above the stairwell, just avoiding 5d space I think. Those corridors are nicely done in bright green, reminding me of the awesomeness of the M2 textures. The door takes us to some shotgun ammo, a corridor, a lift, and then another overlook on the central core. The door automatically opens to a Trooper, but thereÆs also a switch ¢ I guess just in case that failed? WeÆre right above where we first saw this place from, and confused as to where to go next. The safest bet is to first head back to our initial pattern buffer! We can jump to the middle area but there is not much we can do there at the moment besides drown in goo. So back we go, and back we come to our initial vantage point. This time we can take the jump to the left, where the corridor is not such a dead end anymore. Instead it leads us to a series of lifts ¢ one of those where we go up, jump across, hit the switch, and repeat, x4. But on triangles, instead of squares like the end of Bob-B-Q, and also without those nasty Hunters. Right up the top, the last switch is a bit different. It drops the goo level and sends us all the way to the bottom of this cylinder off the side of the central core. And suddenly itÆs empty! We can walk through a corridor back out into the core, and then find a switch on the outside of the central pillar, which brings down platforms around its outside and reveals the blue Hunter, in a really anticlimactic kind of way. He seems to be weakened from time spent in goo? Or was that save on kindergarten ;)? Then we can get inside the central pillar of the central core, and it becomes a lift back up to the top, where we find a platform has extended towards progress! A few Fighters come across it towards us with great agility on such a narrow walkway. Then there are just a few more as we head around and actually follow the outside of the triangle lifts room, seeing in through the transparent force-field texture. And after a bit, we find a switch on the wall, and suddenly realise where we are, as it opens the door we saw partly open in the very first corridor! What a lot weÆve done in order to get nowhere. More than 3,000 words, and IÆm not sure weÆre halfway through this level yet! The next thing we have to figure out is that the door at the other end of this corridor is now open, and thatÆs where weÆre headed next. And it takes us (dun dun duh!) outside the ship! A few Fighters, a tracking cyborg, and then weÆre -definitely- outside. Open to space even. If we fall down just here, we get ported back up, but facing the wall instead of up the stairs, which is annoying if it happens during the fight with the cyborg. Up ahead, thereÆs a huge open space area, some Drones rising out of it and heading straight for us, and an Enforcer in the distance beyond, also taking it out on us. This part is a weird design. ThereÆs a big platform blocking our way if we try to continue around, and the switch is by the Enforcer, which is a bit of a pain with the whole distance thing ¢ the Enforcer, more so than the switch ¢ but if we just drop down into space, and head to the far end, we find ourselves teleported up to the EnforcerÆs side of things, and thatÆs much more convenient! We can hit the switch just to show off then. Next up is a wide corridor, and then a very narrow one coming off it, concealing a Trooper. That corridor is so narrow that the Trooper canÆt move, and when he dies, his corpse just floats there. It is quite disturbing to walk through; I tend to close my eyes! Opening them again, I find myself in a huge curved passage with a goo channel in the middle, and three tracking cyborgs coming along the sides towards me. In mad convenience, their grenades have a habit of landing in goo, but this is still a pain on TC. I remember having very little ammo by this point the first time I played the level. Once the cyborgs are dealt with, we eventually find a shaft to drop down off to the side. And now IÆd say weÆre in the second half of the level. ThereÆs no way back anyway, thatÆs for sure. Going forward, a few Fighters drop down from above an open area, and then we enter another area with computery textures on several long narrow walls, along with blue plasma textured cylinders all the way to the ceiling. We get to fight in what feels like supermarket aisles, except that there are Troopers above us as well as Fighters on our level. ThereÆs also a switch for a lift to go between the levels, and up on the resulting ledge, a pattern buffer and locked door to the right, and a switch and very slightly open door to the left. There are some weird things going on with spawns in this area ¢ I saw one Fighter suspended in mid-air in the previous room, and walking around to that switch seems to spawn another Fighter out there as well, which is really odd given what the switch does. It opens the locked door opposite, fills the previous room with goo, and drops a platform to block off the door we came through, lest this room fill with goo as well. But if something is blocking the platform at the time, it gives up, and we get the curious situation of liquid suddenly ending in the corridor. I found this out while misremembering the method for getting to the secret nearby, and putting myself on that platform while shooting the switch, but the very next playthrough, while writing, a Fighter caused the same thing to happen! He must have been so close to dying in goo! Anyway, weÆve got progress to make again! But first, I have to ask, where did all that goo come from, and why? I mean, we drained the central core, and the goo didnÆt seem to go anywhere, then we wandered past a whole channel of it, and now itÆs dropping from the sky? The wonders of Marathon physics and logic! Where would we be without them :)? Anyway, through that door that was locked before, we find ourselves on the ledges overlooking the new goo. So if we could have got up there without dropping the goo, could we have continued regardless? Dropping off the side is what gets us to the secret, a 1x recharge canister up above, yay. Continuing on, we find a terminal!
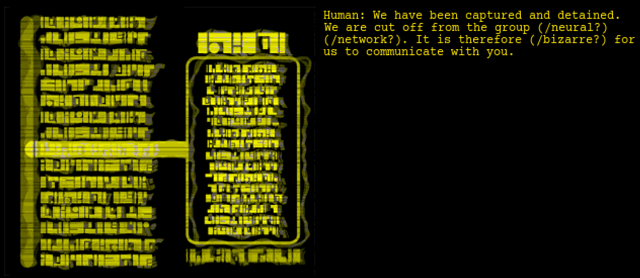
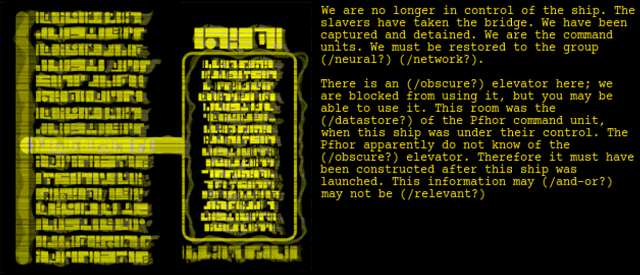
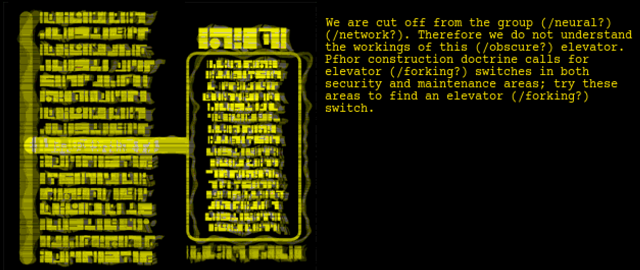
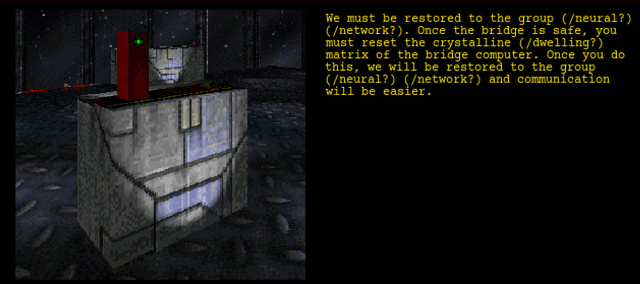
Some bad SÆpht translation, and a lot of repetition ¢ theyÆre cut off from the group neural network, did you hear that? I especially like the idea of an obscure elevator, but IÆm still not actually sure which one they mean ¢ off the far side of the bridge? Or is it more immediate ¢ I guess maybe, given that the first one we come to needs us to find a switch. But thatÆs after dispatching a couple more Troopers and passing the door we will eventually unlock from the other side. So yeah, that lift isnÆt working, and I guess the other way is security or maintenance? ItÆs an odd room with a window out to a bunch of Drones, and further away, a bunch of rods coming out of another part of the ship, with some Troopers visible, but at their end the windows are solidģ. Back in the current room, thereÆs an alien-looking pointy bit, and the switch is hiding in there, along with a 2x recharge canister. Going in there also spawns another brotherly blue Hunter, who again dies very easily ¢ what is up with these guys? Anyway, we can now go up the obscure lift, and we find ourselves on what I think I always assumed was the bridge, but is actually the ōupper deckö according to a later terminal. There are a lot of Pfhor up here, and the best approach to this fight is to run around the back and go into the central bunker ¢ there thereÆs only one Trooper, and thereÆs a 2x recharge station, not just a canister, so we can happily take the place out in a war of attrition. ThereÆs also a switch in that bunker, and that gives us access to the lift at the far side ģ but not of the bridge, as I did indeed call it earlier :). This one descends to more open space, and then we open a hatch back into the lower level of the ship. More blue Hunters are best dealt with before going down there, as these seem to be of the proper toughness, and we can still get back to the 2x recharger if we donÆt fall in. If we fall off into space, we end up back up the top as well, so thatÆs handy. When we do jump in, Fighters spawn back up on the ledge, for some reason. They seem reluctant to follow us down, so they can be pretty much ignored. The next room has some more blue Compilers to help us out on ģ the Bridge! ItÆs another sizeable fight, with Enforcers, Troopers, and Fighters, from different sides and heights. And just when you think it is safe, thereÆs another Enforcer that gets triggered, but IÆm not sure exactly how. It turns out this is what we were looking at from the security/maintenance area; it really is a nicely designed level ¢ much like I remarked with Downward Spiral, areas fit together in ways you just donÆt quite see coming. There are a few useful things upstairs from here, but theyÆre all disabled. What we have to do here is recognise the red bar graph thing from the most recent terminal, which is in the middle of the room downstairs, and just happens to somehow be a switch ¢ the crystalline matrix of the ship. Not an easy one, but this scenario does worse. The fact that we canÆt get back to that previous terminal without dying is a shame here. Anyway, the next one finally shows signs of victory.
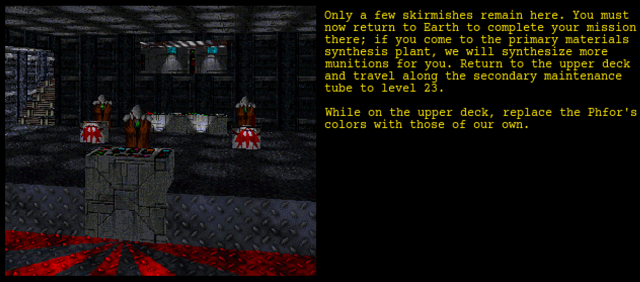
WeÆre heading straight back to Earth ¢ no need to go to the repository room as we donÆt have anything new! And in the meantime, weÆre following some last minute (/obscure?) instructions. But as we emerge back out to near our original obscure lift, and take it back up, we recognise the image from -that- terminal, and it turns out to be a flag! Which we switch from Pfhor colours to SÆpht colours by way of a switch that used to be disabled. Going along maintenance tube 23 looks more like taking a lift down a long way. A newly activated lift right next to the original obscure one, and really just as obscure. And the primary material synthesis station turns out to be mainly blocked off, force-fields keeping us out of the juiciest looking ammo areas, but I guess we canÆt complain. No bugger would listen anyway. And a final terminal confirms weÆre heading back to Earth. The Pfhor are readying the Juggernaughts, and the SÆpht are getting better at translating stuff into English ģ and thatÆs why they were slavers and slaves respectively!
| ||
|
| Replies: |
| Tour of Duty: Polygonium Opus | Martin | 6/17/15 3:18 a.m. | |
| Re: Tour of Duty: Polygonium Opus | Hokuto | 6/17/15 6:21 a.m. | |
| Re: Tour of Duty: Polygonium Opus | VikingBoyBilly | 6/17/15 1:39 p.m. | |
| Re: Tour of Duty: Polygonium Opus | Bob-B-Q | 6/18/15 7:18 a.m. | |
| Re: Tour of Duty: Polygonium Opus | VikingBoyBilly | 6/18/15 9:11 a.m. | |
| Re: Tour of Duty: Polygonium Opus | Bob-B-Q | 6/19/15 8:06 a.m. | |
| Re: Tour of Duty: Polygonium Opus | VikingBoyBilly | 6/19/15 5:02 p.m. | |
| Re: Tour of Duty: Polygonium Opus | Bob-B-Q | 6/20/15 8:54 a.m. | |
| Re: Tour of Duty: Polygonium Opus | Lion O Cyborg | 6/23/15 3:29 a.m. | |
| Re: Tour of Duty: Polygonium Opus | Bob-B-Q | 6/23/15 6:29 a.m. | |
| Re: Tour of Duty: Polygonium Opus | VikingBoyBilly | 6/23/15 12:27 p.m. | |
| Re: Tour of Duty: Polygonium Opus | PerseusSpartacus | 6/18/15 8:37 p.m. | |
| Re: Tour of Duty: Polygonium Opus | Martin | 6/18/15 11:52 p.m. |
|
Problems? Suggestions? Comments? Email maintainer@bungie.org Marathon's Story Forum is maintained with WebBBS 5.12. |