/-/S'pht-Translator-Active/-/
|
|
/-/S'pht-Translator-Active/-/ |
| Tour of Duty: Hang Brain | ||
| Posted By: Martin | Date: 4/22/14 3:11 a.m. | |
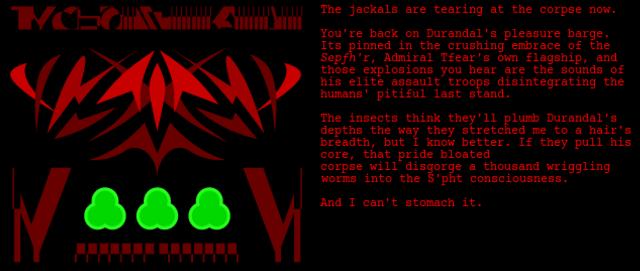
 Last time on Tour of Duty, we kind of betrayed Tycho as we apparently headed to his ship to try to release Durandal’s from its hold. We got teleported into space by Tycho and saved by Durandal; we killed compilers, opened doors, switched switches, looked at terminals above lava from a safe distance, and were ultimately told by Durandal that Tycho’s Pfhor were at his core, and we were going to fight them off. Now we begin looking at a pattern buffer, with a compiler reading a terminal just opposite, a terminal starring Tycho:
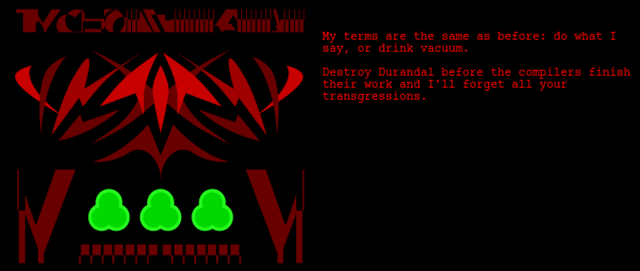
He’s still pissed off, but seemingly expects us to do his bidding again; a bit confusing, that. We are indeed where we expected to be, and Tycho has a fun turn of phrase. Now it is Tfear sending Pfhor to take out Durandal’s core while Tycho knows better. Okay, so Durandal said Tycho had a special unit of compilers for his capture and confinement – I guess that is slightly different from what Tfear wants. We’re still not clear on Durandal’s progress in this timeline, as in how far he got with Thoth before his ship got disabled, but the idea of one thousand thousand slimy things, or worms, wriggling through the S’pht consciousness, makes one wonder about what information he might have had. At the very least I’m guessing it might have brought all of the compilers back on side, and it may even have helped to summon the S’pht’Kr. Durandal thought it was enough to cause humiliation for the Pfhor, after all. Tycho mentions explosions, and from time to time we see big white flashes with explosions much like those associated with Juggernaught death. There’s clearly something going on out there! We head out along the corridor and find it cut off. There are large inaccessible shapes off to the left, and a bright room to the right, wherein a switch. This actually drops away itself, and brings in some tumblers much like those switches on Thing What Kicks…. They then slide back into the ceiling, to reveal through a window a tall smashable circuit panel that we recognise from Begging For Mercy…. In fact a look at the automap suggests that that area is rather like the central area of that level … and of course we have something like the same goal. We can see that area on the overall map that I put together:
Hitting the switch also drops the platform that was stopping us going further down the corridor, so we don’t have to smash that panel right now, handy for the scratchstarter, as while we get quite a bit of AR ammo in that switch room – in fact this is the first time in ages that we have been so directed towards using the AR – we don’t get a weapon for smashing things from a distance. While that should suit Blackstar just fine, it does make the next area all the more painful for the scratchstarter, as there are plenty of Hunters and one or two Troopers just around the corner! The SPNKR from Foe Hammer comes in very handy here, and indeed in several areas of this level … it is a very dark one *sigh* and sometimes just missiling into the void is worthwhile. After this initial onslaught, we head up some stairs and enter the ring above the ring with the core circuits. It too has a lot of Hunters and Troopers, and as PS mentioned in one of the recent discussions, the Troopers are especially nasty here, often favouring lengthy barrages from the AR’s main trigger over grenades, and despite the inaccuracy thereof, it can be a real pain when we’re often not sure where they are shooting from in the darkness. The radar is less useful than we’d like here, with rogue signals, signals lacking where they ought to be, and general frustration. To the right as we enter the ring, from the east, we find a dead-end. There is one room off to the side, but nothing much in there. The ring is just dark, with yellow strips on the ceiling and green lights, but little else of inspiration. Carrying on around the ring to the west, we find another blockade, but not before we get to a pillar with a 1x recharger, yum, and a set of stairs to a higher level that we just can’t quite get to. There’s another little inside room here, but this one has windows through to the central core area, and views to a couple of the outer ring circuits, which open up as we take out the inner ring ones. Just opposite on the outer wall of the ring is a path around and down some stairs to another switch. This time we do get an AR as well as ammo, but less of that than in the first switch room. And just like before, we get to go further around the ring after hitting the switch. Based on the map, that is a massive platform that gets moved! Next on the agenda we have another inside room with windows, another side room with stairs to a switch, and this time a pattern buffer, but no ammo. There is another set of stairs from here, but first let’s go around the last bit of the ring area, to another pillar with unreachable stairs but no recharger, and one last inner room with windows … and of course more annoying Troopers and Hunters; they go without saying. There’s also an opening nearby that allows us to get down to the core ring, via some stairs with an odd little alcove above. The door to the core area is one of the ones we went through back on Begging For Mercy, but it is the only one that opens this time around, and clear, where we have come from is quite different from how that level looked – people have suggested there might be many such areas making up Durandal, but it also just might be because playing the same level again would be less interesting. There is plenty of ammo around the ring, and a 3x recharge canister, but also plenty of Troopers to strip us of that again. There is a terminal on the north side, just like before, but it is just a duplicate of the one from the start of the level. Now, for that last set of stairs we overlooked earlier. The staircases on this level tend to be very steep, and watching on the map as we go up them sometimes shows this off as a jittery rather than smooth movement. This one is borderline. It takes us to a ring above the ring above the ring. This time full of compilers both visible and invisible, and confusing to navigate due to the overlapping areas on the map. Two staircases lead down from parts of this area – the unreachable ones from earlier, handy if we happen to need to recharge. There are yellow walls that make it hard to get around this area, but we can use grenades if we choose to, of course. The other way is to climb a set of stairs not far from where we enter. This gets us to a higher series of platforms, but they’re not so much use to us right now, as we need to get to the even higher ones. Still, we can use these ones to get across this area, and then fall back down to look for another set of stairs. It really is confusing, but I’ve got my head around using the map thanks to preparation for this writeup :). What we find if we have smashed the 7 panels so far, is a door open on the west side of the inner core tower, only higher up, and leading to an 8th panel. On smashing it we hear a door opening. This is on the east side, accessible via the lower higher platforms (got that?). The opening reveals that that inner tower is in fact hollow – all the way to the bottom! Falling in, we find a pattern buffer, a terminal, and one last smashable panel, and we pick up an uplink chip. Before we smash the panel, we have a look at the terminal.
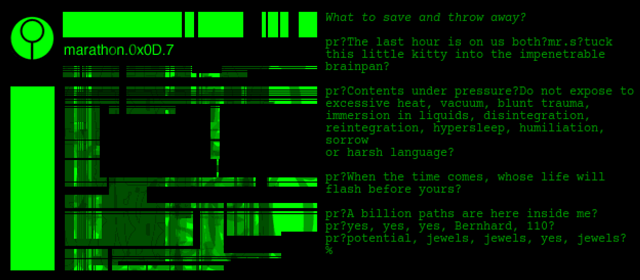
The log on is that one we thought might mean “fake” back in M2 days, hmmm. It seems to contain Durandal’s last will and testament in this timeline, and rather a set of memories flashing before the eyes – our eyes, Durandal even makes reference to that concept. We’ve got Mr S(trauss), and a few bits and pieces we think might be related to D’s time with him, and much of the rest is Durandal thinking about how he can save at least part of himself … with our help. What to keep and throw away? I guess it would be a good time to make things more efficient ;). And then there’s all the odd instructions of caution – of how to handle an image of Durandal, we figure … while the uplink chip, which serves no other purpose given that it disappears when we hit By Committee, provides an interface with our own cyborg mind … somehow. Tuck this little kitty into the impenetrable brainpan? Perhaps this, coming straight after the reference to Mr S, refers to something that was actually done before, in his time, that Durandal actually knows this will work in the first place. As usual, a bit of mystery :). Signing out of this terminal teleports us back to the start of the level, an oddity that caused some to go hunting for somewhere else to put that uplink chip! Is there some way we can get down to that last room with more left to do than just smashing the last panel? I was wondering what could be done if we SPNKRed up to those inaccessible stairs earlier on, but still we would need to smash all the panels to get down to the end! Anyway … when we smash said last panel, the final terminal changes.
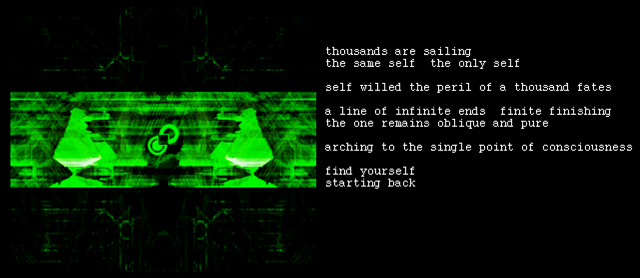
Another Thoth-like poetic view of another world ending? Didn’t we have burning air in M2 S’pht terminals, or something like it? Is this descriptive of the role of Thoth? The idea of balance has in the past come down to just wiping out both sides, or at least having the potential to – mutually assured destruction, only from an outside perspective. Taken as us destroying our father (Durandal?), even with the apostrophe that shouldn’t be there, well, you could say that as we just smashed all those panels…. But now destroying itself? We do indeed still fail in this timeline, perhaps unable to comprehend what needs to be done, perhaps still at the bidding of an AI that doesn’t quite get it. But this right now is a crucial element of our ultimate success, the transference of Durandal, another thing we can carry across timelines, impenetrable indeed, even when we get our weapons nicked! Find the new way? This is surely the hardest one to figure given that we seem to start up again in a situation that follows on from here, but we’re still not in control – the decision to leave this timeline to its own devices is still not our own; the ability to see that even with our help there would be no happy ending, is still not ours; this is perhaps where that all gets signed over to us. The guide has taken us as far as it knows how; now it’s up to us? I’ll have to follow things very closely from here, as there are still many things I do not understand :). One thing that I do understand, however, is that it is time for another handover. That’s right, Billy is back to take us through our final dream sequence, although that will require my sending more terminal pics to PS and his doing up more maps. Now sleep.
| ||
|
| Replies: |
| Tour of Duty: Hang Brain | Martin | 4/22/14 3:11 a.m. | |
| Re: Tour of Duty: Hang Brain | Hokuto | 4/22/14 5:00 a.m. | |
| Re: Tour of Duty: Hang Brain | VikingBoyBilly | 4/22/14 5:30 p.m. |
|
Problems? Suggestions? Comments? Email maintainer@bungie.org Marathon's Story Forum is maintained with WebBBS 5.12. |